5 Beginner-Friendly Rosemary Plants You Can Grow with Ease

5 Beginner-Friendly Rosemary Plants You Can Grow with Ease

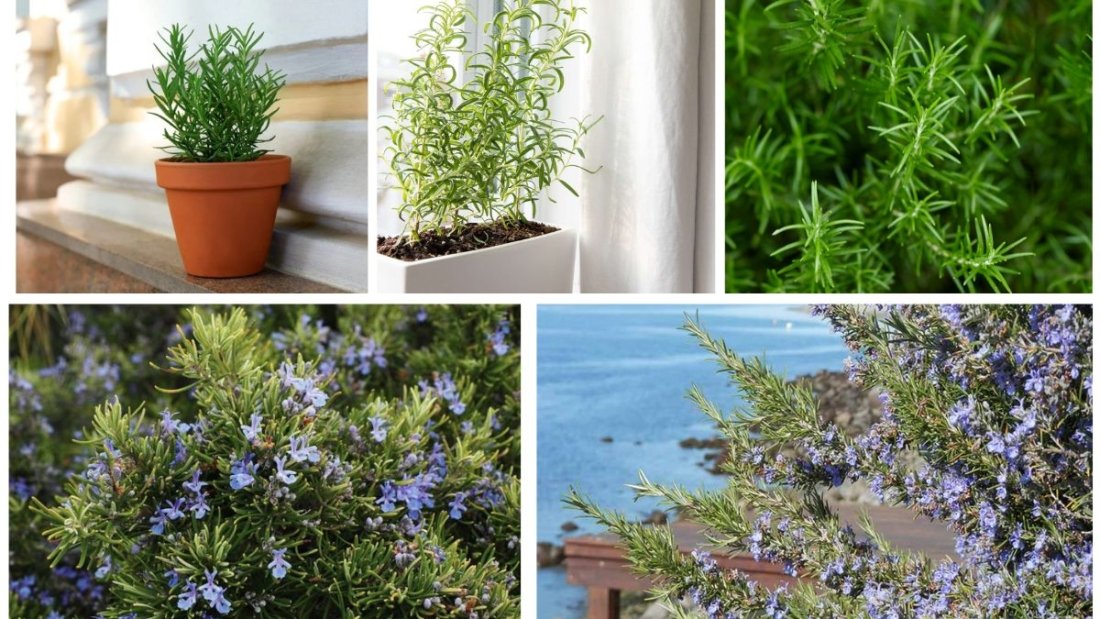
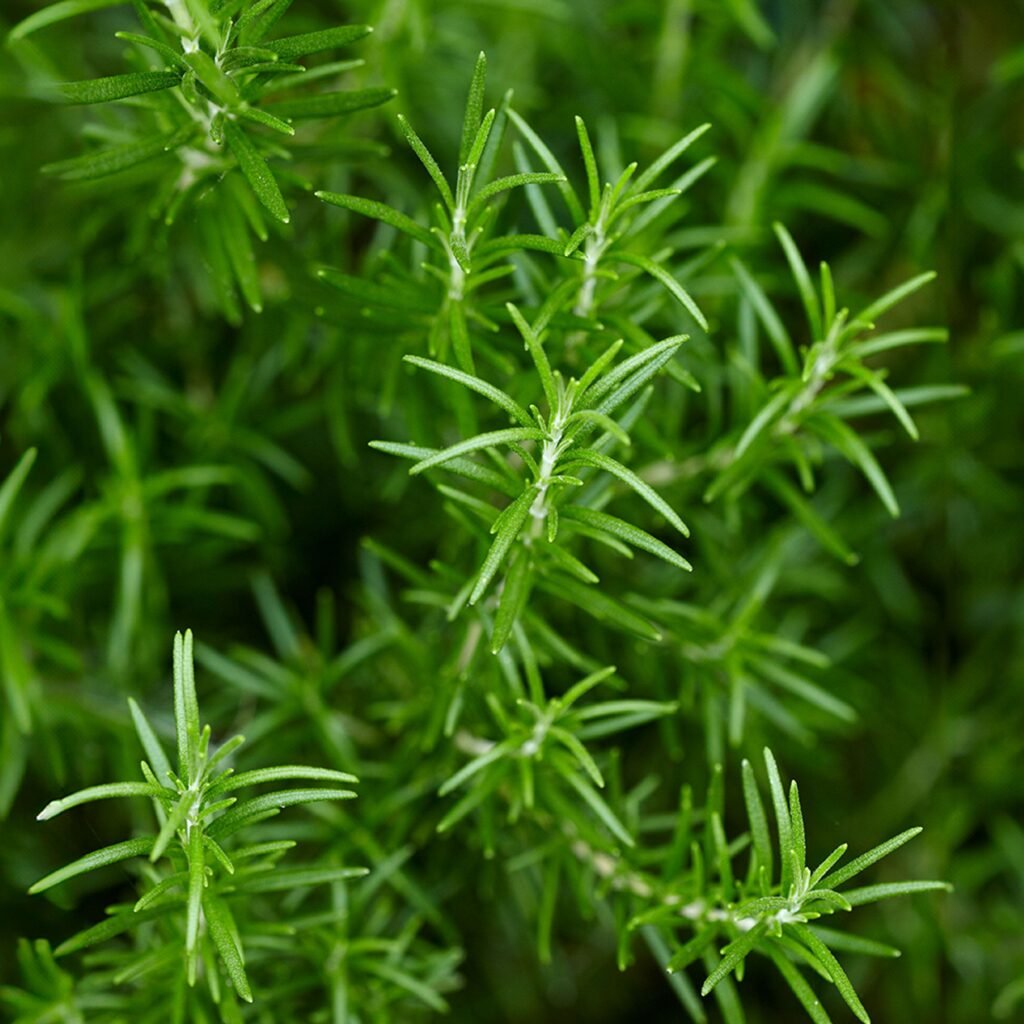
Rosemary (Rosmarinus officinalis) is one of the most versatile and beloved herbs for both culinary and ornamental purposes. With its fragrant needle-like leaves, resilience, and health benefits, rosemary is a must-have in every home garden. The good news? Rosemary plants are surprisingly beginner-friendly, making them perfect for anyone who wants to start gardening without much hassle.

In this article, we’ll explore five beginner-friendly rosemary varieties that you can grow with ease. Along the way, you’ll also learn how to care for them, where to plant them, and how to make the most of their fragrant beauty and culinary uses.


Why Grow Rosemary?

Before diving into the specific varieties, it’s important to understand why rosemary is such a favorite among gardeners:

  • Low Maintenance: Once established, rosemary thrives with little care.
  • Drought-Tolerant: Perfect for regions with dry weather.
  • Culinary Uses: Adds a unique aroma and flavor to meat, vegetables, soups, and breads.
  • Medicinal Benefits: Rich in antioxidants and known for improving memory, digestion, and circulation.
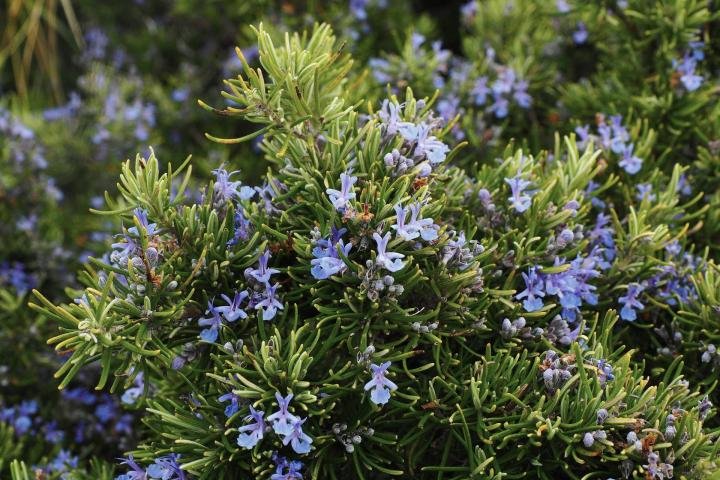
  • Ornamental Value: Its evergreen foliage and small blue, white, or purple flowers brighten up gardens and patios year-round.

1. Tuscan Blue Rosemary – Tall and Fragrant

Tuscan Blue rosemary is one of the most popular varieties for beginners. Known for its upright growth and beautiful deep blue flowers, this plant adds height and elegance to any garden.

Key Features:

  • Grows up to 5–6 feet tall when planted outdoors.
  • Produces strong, aromatic leaves perfect for cooking.
  • Blooms profusely with vibrant blue flowers in spring and early summer.

Why It’s Beginner-Friendly:

Tuscan Blue rosemary is very hardy and forgiving. It tolerates heat, drought, and poor soil conditions, requiring minimal intervention once it’s established. Its upright shape also makes it easy to prune and harvest.

Growing Tips:

  • Plant in a sunny spot with well-draining soil.
  • Water only when the soil is dry; avoid waterlogging.
  • Excellent choice for hedges or as a striking garden centerpiece.

2. Arp Rosemary – Cold-Hardy and Resilient

For those living in colder climates, Arp rosemary is a lifesaver. It’s one of the most cold-hardy rosemary varieties, surviving temperatures as low as -10°F (-23°C).

Key Features:

  • Can grow up to 3–4 feet tall.
  • Gray-green leaves with a lighter fragrance compared to Tuscan Blue.
  • Produces pale blue flowers in late winter to early spring.

Why It’s Beginner-Friendly:

This variety’s resilience against frost makes it one of the easiest choices for gardeners in northern regions. Even if winters are harsh, Arp rosemary bounces back quickly in spring.

Growing Tips:

  • Plant near a south-facing wall or in a container if winters are harsh.
  • Minimal pruning required—just trim to shape.
  • Great for seasoning soups, poultry, and roasted vegetables.

3. Prostratus (Creeping Rosemary) – Perfect for Ground Covers

If you’re looking for a variety that doubles as a decorative ground cover, creeping rosemary (Rosmarinus officinalis ‘Prostratus’) is the way to go.

Key Features:

  • Low-growing, trailing habit, reaching about 2 feet tall but spreading wide.
  • Cascades beautifully over walls, containers, or hanging baskets.
  • Produces soft blue flowers that attract pollinators.

Why It’s Beginner-Friendly:

This variety is ideal for gardeners with limited space or those who prefer container gardening. Its trailing growth means less pruning and more visual appeal. It’s also drought-tolerant and can handle neglect.

Growing Tips:

  • Works wonderfully in rock gardens or as an edging plant.
  • Requires full sun and good drainage.
  • Regularly trim to encourage denser foliage and prevent legginess.

4. Blue Boy Rosemary – Compact and Manageable

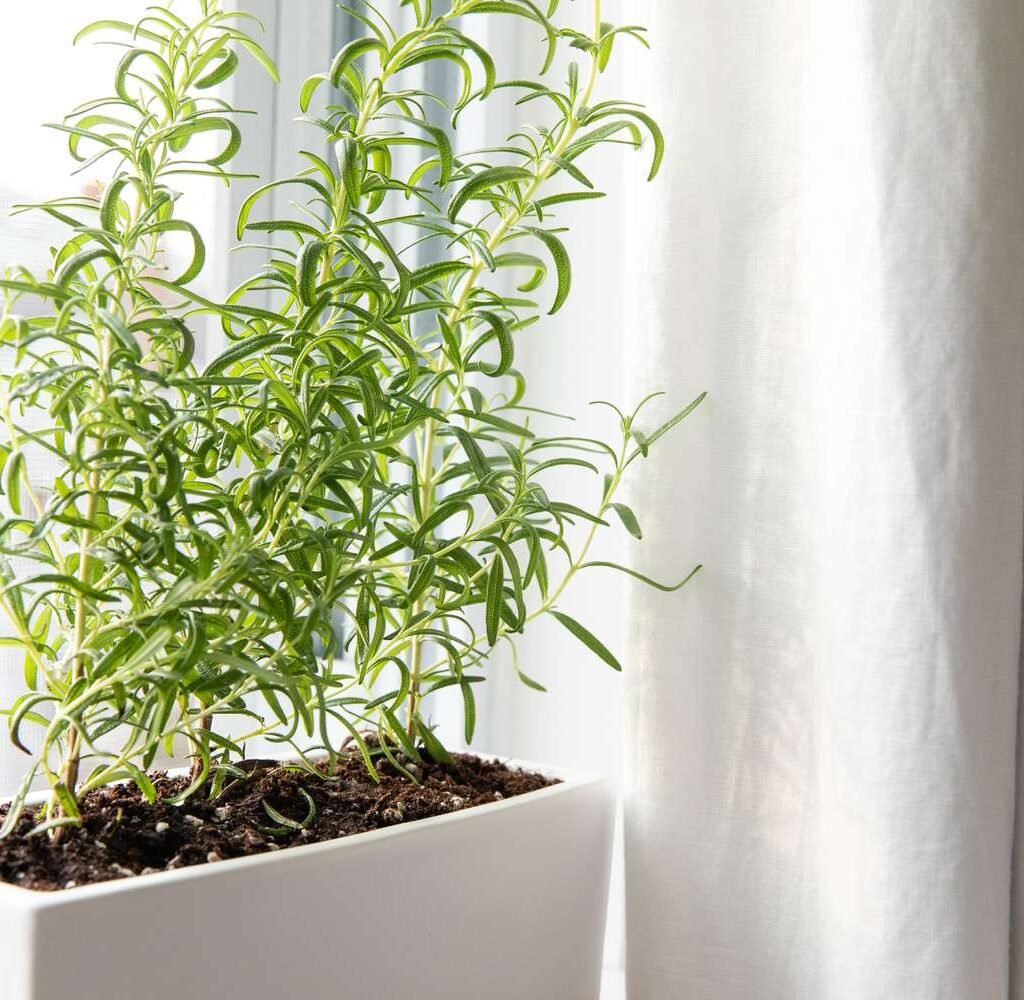
Blue Boy rosemary is a dwarf variety, making it a perfect choice for small gardens, patios, or even kitchen windowsills.

Key Features:

  • Compact size, rarely exceeding 12–18 inches tall.
  • Small, needle-like leaves packed with fragrance.
  • Blooms with light blue flowers in spring.

Why It’s Beginner-Friendly:

Its compact growth makes Blue Boy rosemary incredibly easy to manage. Beginners don’t have to worry about constant pruning or dealing with a plant that outgrows its space. It’s ideal for container growing and quick kitchen access.

Growing Tips:

  • Plant in small pots for indoor use or balcony gardens.
  • Needs consistent sunlight—place near a south-facing window if indoors.
  • Use well-drained soil and water sparingly.

5. Golden Rain Rosemary – Decorative and Unique

If you want a rosemary plant that stands out, Golden Rain rosemary is a unique option with striking variegated foliage. The golden-yellow streaks running through its green leaves make it as ornamental as it is useful.

Key Features:

  • Medium-sized shrub, around 3 feet tall.
  • Distinctive golden-green leaves.
  • Delicate blue flowers that add seasonal charm.

Why It’s Beginner-Friendly:

Golden Rain rosemary is hardy, resilient, and requires very little maintenance. The added bonus is its decorative appeal, which means you get both beauty and function with minimal effort.

Growing Tips:

  • Perfect for borders, decorative hedges, or patio pots.
  • Needs full sun for the best leaf coloration.
  • Avoid overwatering to prevent root rot.

General Rosemary Care for Beginners

While each variety has its own quirks, the following care tips apply to all rosemary plants:

  1. Sunlight: Rosemary thrives in full sun—at least 6–8 hours of direct sunlight daily.
  2. Soil: Well-draining soil is essential. Sandy or loamy soil works best.
  3. Watering: Allow the soil to dry out between waterings. Rosemary dislikes “wet feet.”
  4. Pruning: Trim lightly after flowering to maintain shape and encourage new growth.
  5. Fertilizer: Use a balanced fertilizer sparingly in the growing season.
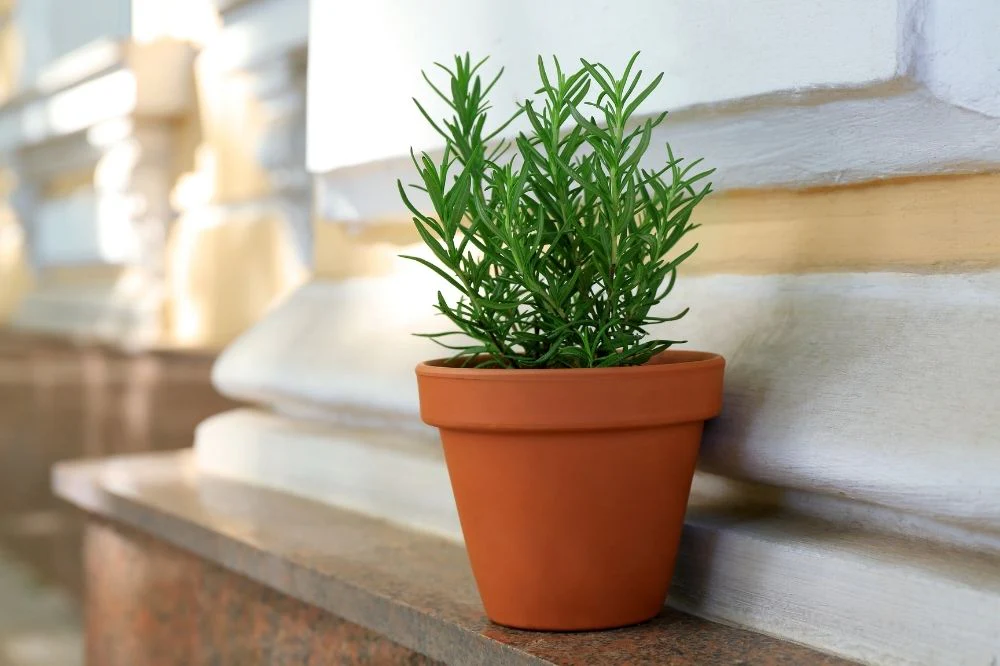
  6. Container Growing: Choose terracotta pots with good drainage if growing indoors or in small spaces.

Culinary and Everyday Uses of Rosemary

Growing rosemary isn’t just about greenery—it’s about practical uses too. Here’s how you can make the most of your rosemary harvest:

  • Culinary: Infuse flavor into roasts, grilled vegetables, breads, and infused oils.
  • Medicinal: Brew rosemary tea for digestion and mental clarity.
  • Aromatherapy: Use in essential oils, bath salts, or potpourri.
  • Ornamental: Incorporate into wreaths, centerpieces, or dried flower arrangements.

Final Thoughts

Growing rosemary doesn’t require expert gardening skills—it’s a herb that thrives on minimal care and brings maximum rewards. Whether you’re planting the tall and fragrant Tuscan Blue, the cold-hardy Arp, the decorative Golden Rain, the compact Blue Boy, or the trailing Creeping Rosemary, you’ll find that each variety offers unique benefits for your home and garden.

For beginners, these five rosemary plants are the perfect starting point. With just a little attention to sunlight, soil, and watering, you’ll soon have a thriving rosemary collection that delights your senses, enhances your cooking, and beautifies your garden.

Growing Cranberry Plants for Fresh Seasonal Harvests

Growing Cranberry Plants for Fresh Seasonal Harvests

Cranberries are more than just a festive holiday fruit; they are a powerhouse of nutrients and an excellent addition to any home garden. Known for their tangy flavor and vibrant red hue, cranberries thrive in specific conditions that mimic their natural habitats: cool climates, acidic soils, and plenty of water. While traditionally grown in bogs, cranberries can also be cultivated in home gardens or containers with the right care. If you’re looking for a rewarding and seasonal crop that provides both beauty and nutrition, cranberries are a fantastic choice.

This article will guide you step-by-step on how to grow cranberry plants at home for fresh seasonal harvests, covering soil preparation, planting techniques, care, and harvesting tips.


Why Grow Cranberries at Home?

Before diving into the process, it’s worth knowing why cranberries deserve a place in your garden:

  • Nutritional powerhouse – Rich in antioxidants, vitamin C, and dietary fiber.
  • Versatile fruit – Used in sauces, juices, jams, baked goods, and even savory dishes.
  • Attractive ground cover – Their low-growing, glossy green foliage with pink flowers adds visual charm before producing red berries.
  • Long lifespan – With proper care, cranberry plants can live and produce fruit for up to 50 years.

Step 1: Understanding the Growing Requirements

Cranberries have unique requirements compared to many other fruits. They naturally thrive in boggy, acidic soils, but you don’t need to replicate a swamp to grow them at home. Instead, create a controlled environment with these essentials:

  • Climate: Cranberries need a cold climate with winter dormancy. USDA zones 2–7 are best. They require a chilling period (around 1,000 hours below 45°F/7°C) to produce fruit.
  • Soil: Acidic soil with a pH between 4.0 and 5.5. Sandy, peat-based soils work well.
  • Sunlight: Full sun is crucial for berry production. Aim for at least 6–8 hours daily.
  • Moisture: Cranberries love consistently moist soil but not standing water in a home setting.

Step 2: Choosing the Right Cranberry Variety

Several varieties are available for gardeners. Popular types include:

  1. ‘Stevens’ – A hybrid known for high yields and large berries.
  2. ‘Ben Lear’ – Early ripening and excellent flavor, perfect for shorter seasons.
  3. ‘Pilgrim’ – Vigorous growth and ideal for larger gardens.
  4. ‘Early Black’ – Produces smaller berries but has rich flavor.

Choose a variety based on your climate and desired harvest time.


Step 3: Preparing the Soil and Planting Site

Since cranberries thrive in acidic, sandy soils, preparing the planting site is critical.

  1. Create a raised bed or sunken plot about 4–6 inches deep.
  2. Amend the soil with peat moss, sand, and composted pine needles to achieve acidity.
  3. Ensure good drainage while maintaining moisture.
  4. Test soil pH and adjust with sulfur or acidic amendments if needed.

Step 4: Planting Cranberries

Cranberries are typically planted using rooted cuttings or plugs rather than seeds, as seeds take years to mature.

  • Timing: Plant in spring after the last frost when the soil is workable.
  • Spacing: Place plants about 2 feet apart; they will spread over time.
  • Planting depth: Set plugs or cuttings so that the roots are covered but the crown (where stems emerge) is above the soil.
  • Mulching: Apply a light mulch of sand or pine needles to retain moisture and suppress weeds.

Step 5: Caring for Your Cranberry Plants

Caring for cranberries requires consistency but not excessive effort. Here are the essentials:

1. Watering

Cranberries have shallow roots, so consistent moisture is key. Water regularly, especially during dry spells. Aim for moist but not waterlogged soil.

2. Fertilizing

Use a balanced, slow-release fertilizer with higher nitrogen during early growth. Avoid over-fertilizing, as it encourages foliage growth over fruiting.

3. Weeding

Cranberries don’t compete well with weeds. Hand-weed regularly or use mulch to suppress unwanted growth.

4. Sanding

In commercial bogs, a thin layer of sand is spread over plants every few years to encourage new root growth and suppress pests. You can mimic this by adding a half-inch of sand each spring.

5. Winter Care

Cranberries require a chilling period. In colder zones, natural winters suffice. In milder zones, consider using shade cloths or placing containers in cooler locations.


Step 6: Pest and Disease Management

Cranberries are relatively hardy but can face issues such as:

  • Fruitworm and cranberry weevil – Insects that damage fruit. Use organic insecticidal soap or neem oil.
  • Fungal diseases (root rot, leaf spot) – Prevent by ensuring proper air circulation and avoiding waterlogged soil.
  • Birds – Netting can protect ripening berries.

Regular monitoring ensures problems are caught early.


Step 7: Harvesting Cranberries

Patience is key: cranberries usually take 2–3 years to begin producing fruit. Once established, they yield annually.

  • Season: Harvest from late September through October.
  • Signs of ripeness: Berries turn deep red, feel firm, and bounce slightly when dropped (the famous “bounce test”).
  • Harvest method: For home gardeners, simply handpick berries. Avoid harvesting too early, as unripe cranberries are sour and less nutritious.

Step 8: Storing and Using Fresh Cranberries

Fresh cranberries can be stored for weeks if handled properly:

  • Refrigeration: Keep in a breathable container for up to 4 weeks.
  • Freezing: Rinse, dry, and freeze cranberries to enjoy them year-round.
  • Preservation: Use for juices, sauces, jams, chutneys, or baked goods.

Benefits of Growing Your Own Cranberries

  1. Sustainable food source – Reduce reliance on store-bought produce.
  2. Fresh taste – Homegrown cranberries are more flavorful and nutritious.
  3. Health perks – Known for supporting urinary tract health, reducing inflammation, and boosting immunity.
  4. Aesthetic value – Beautiful ground cover with ornamental appeal.

Pro Tips for Success

  • Start with a small bed or container if you’re new to cranberries.
  • Test and monitor soil pH annually to maintain acidity.
  • Don’t expect immediate harvests; cranberry growing is a long-term investment.
  • Companion planting with other acid-loving plants (like blueberries) can maximize garden space.

Final Thoughts

Growing cranberries at home may sound challenging, but with the right setup and care, it’s a highly rewarding venture. These perennial plants provide not only fresh, tangy fruits but also add ornamental beauty to your garden. By preparing the soil, ensuring proper care, and practicing patience, you can look forward to seasonal harvests of vibrant red cranberries for decades to come.

Whether you want to make homemade cranberry sauce for the holidays, enjoy antioxidant-rich juice, or simply add an unusual crop to your garden, cranberries are a fantastic choice for dedicated gardeners.

How to Prune Tomato Plants for Bigger Harvests

How to Prune Tomato Plants for Bigger Harvests

Tomatoes are one of the most rewarding plants you can grow at home. Whether you cultivate them in your backyard, on a balcony, or in a greenhouse, nothing beats the satisfaction of picking fresh, juicy tomatoes straight off the vine. However, achieving bigger harvests requires more than just planting seeds and watering them regularly. One of the most effective techniques for boosting tomato yields is pruning.

Pruning tomato plants not only helps in controlling their growth but also ensures better airflow, stronger stems, and increased fruit production. Many beginner gardeners often overlook this essential practice, resulting in smaller or fewer tomatoes. In this guide, we’ll take a deep dive into why pruning matters, the different methods, step-by-step instructions, and expert tips for keeping your tomato plants thriving throughout the season.


Why Pruning Tomato Plants Is Important

Pruning plays a vital role in the health and productivity of tomato plants. Here are the main reasons you should never skip it:

  1. Improves Air Circulation
    Removing unnecessary leaves and stems reduces overcrowding. This allows more airflow between branches, keeping the plant drier and preventing fungal diseases like blight.
  2. Prevents Energy Waste
    Tomato plants are vigorous growers. Without pruning, they spend too much energy growing extra leaves and suckers instead of focusing on producing larger fruits.
  3. Increases Sunlight Exposure
    Pruning exposes developing fruits to sunlight, which improves ripening and enhances flavor.
  4. Encourages Stronger Plants
    With fewer competing branches, the plant strengthens its main stems, resulting in sturdier plants that can support heavy fruit loads.
  5. Leads to Bigger Harvests
    When the plant channels its energy into fewer, healthier fruits, you’ll notice not only bigger tomatoes but often a higher yield overall.

Determinate vs. Indeterminate Tomatoes

Before you start pruning, it’s important to know what type of tomato plant you’re growing:

  • Determinate Tomatoes (Bush Type):
    These grow to a certain height and stop. They produce fruit all at once, usually within a few weeks. Minimal pruning is needed since excessive trimming can reduce yields.
  • Indeterminate Tomatoes (Vine Type):
    These keep growing and producing fruit throughout the season until frost. Pruning is crucial for managing their size, improving air circulation, and maximizing harvests.

Most pruning techniques are applied to indeterminate varieties, as they require more maintenance to stay productive.


Tools You’ll Need for Pruning

Pruning is simple, but having the right tools makes the process safer and more effective:

  • Clean, sharp pruning shears
  • Gardening gloves
  • A small hand sanitizer spray (to disinfect tools between cuts and prevent disease spread)
  • Stakes, trellises, or tomato cages for plant support

Step-by-Step Guide to Pruning Tomato Plants

Here’s a practical guide you can follow throughout the growing season:

Step 1: Identify the Suckers

  • Suckers are small shoots that grow between the main stem and a branch, forming in the “V” or crotch of the plant.
  • If left unchecked, these suckers grow into full stems, making the plant bushier and less productive.

Step 2: Remove Suckers Early

  • Pinch off small suckers by hand when they are 2–4 inches long.
  • For larger suckers, use clean pruning shears to avoid tearing the plant.

Step 3: Focus on the Lower Leaves

  • Remove the lower leaves near the base of the plant as they often touch the soil and can attract pests or diseases.
  • This also increases airflow around the plant base.

Step 4: Thin Out Excess Foliage

  • Don’t over-prune, but thin out overcrowded areas so sunlight can reach the developing fruits.
  • Keep the top leaves intact since they provide essential photosynthesis for fruit growth.

Step 5: Support the Plant

  • Tie the main stem to a stake or secure it with a tomato cage.
  • Proper support prevents branches from snapping under the weight of heavy fruit clusters.

Step 6: Continue Throughout the Season

  • Pruning is not a one-time task—it’s a continuous process.
  • Check your plants every few days for new suckers and diseased leaves.

Common Mistakes to Avoid While Pruning

Even experienced gardeners sometimes make mistakes. Here are a few to watch out for:

  1. Over-Pruning – Removing too many leaves can stress the plant and reduce its ability to photosynthesize.
  2. Pruning at the Wrong Time – Avoid pruning during very hot afternoons as it can cause sunscald. Early morning is the best time.
  3. Leaving Large Wounds – Always use sharp tools to make clean cuts and reduce the risk of infection.
  4. Neglecting Tool Hygiene – Dirty tools spread disease from one plant to another. Always disinfect before pruning a new plant.

Benefits of Pruning Tomato Plants

To recap, here’s what you gain by making pruning a part of your gardening routine:

  • Stronger stems that carry more fruit
  • Healthier plants with fewer diseases
  • Bigger, juicier tomatoes
  • Easier harvesting and maintenance
  • A neater and more manageable garden

Advanced Pruning Tips for Bigger Harvests

If you want to take your tomato pruning skills to the next level, try these additional techniques:

  1. Single Stem Pruning
    Train your tomato plant to grow on one main stem by removing all side suckers. This is especially useful in small spaces or greenhouses.
  2. Two-Stem Pruning
    Keep one sucker just below the first flower cluster and train it as a second main stem. This gives you a balance of plant size and productivity.
  3. Topping the Plant
    Toward the end of the season, cut off the growing tips of the plant. This stops it from producing new leaves and directs energy to ripening existing fruits.
  4. Mulching After Pruning
    Once you prune, apply mulch around the plant base. This protects the exposed soil, retains moisture, and prevents disease spores from splashing onto leaves.

Frequently Asked Questions

1. Can you prune determinate tomato plants?
Light pruning is fine—just remove yellowing leaves or those touching the soil. Heavy pruning may reduce their overall yield.

2. How often should you prune tomato plants?
Check them once a week during the growing season. Suckers can grow quickly, so regular maintenance is key.

3. Can pruning harm tomato plants?
Not if done correctly. Avoid removing more than one-third of the plant at once to prevent stress.

4. Does pruning really increase tomato yield?
Yes! By focusing the plant’s energy on fewer, healthier fruits, you’ll get bigger, tastier tomatoes.


Conclusion

Pruning tomato plants might seem intimidating at first, but once you learn the basics, it becomes second nature. It’s one of the simplest ways to boost yields, prevent diseases, and enjoy bigger, juicier harvests. Whether you’re growing indeterminate varieties that need frequent attention or determinate types that need only light trimming, pruning is an essential skill for every gardener.

By identifying suckers early, removing lower leaves, and keeping your plants well-supported, you’ll be rewarded with a garden full of vibrant tomato plants that produce delicious fruits all season long. With patience, care, and the right pruning strategy, you’ll never look at your tomato harvest the same way again!

How to Care for a Jade Plant Anywhere, Anytime

How to Care for a Jade Plant Anywhere, Anytime

The jade plant (Crassula ovata), also called the “money plant” or “lucky plant,” is a hardy succulent admired for its lush, coin-shaped green leaves and easy-going nature. Known as a symbol of prosperity and good fortune, the jade plant is a popular choice for both homes and offices. Whether you are a beginner gardener or a seasoned plant enthusiast, this resilient plant can thrive under a wide range of conditions with just a little care.

This guide will walk you through step-by-step jade plant care, including sunlight, watering, soil, propagation, and troubleshooting tips, so you can enjoy a healthy jade plant anywhere, anytime.


Understanding the Jade Plant

Jade plants are native to South Africa and Mozambique, where they thrive in sunny, dry environments. As succulents, they store water in their thick, fleshy leaves and stems, making them drought-tolerant and low-maintenance.

Key features include:

  • Lifespan: With proper care, jade plants can live for decades, often passed down as heirlooms.
  • Growth: They grow slowly, reaching 2–5 feet tall indoors.
  • Appearance: Glossy, oval leaves that can turn red at the edges when exposed to bright sunlight.
  • Symbolism: In Feng Shui, jade plants are believed to attract wealth, health, and harmony.

Light Requirements

Jade plants love bright, indirect sunlight but can adapt to different lighting conditions, making them versatile for both homes and offices.

  • Indoors: Place your jade plant near a south- or west-facing window for at least 4–6 hours of sunlight daily. If natural light is limited, supplement with a grow light.
  • Outdoors: If kept outside, introduce the plant gradually to full sun to prevent leaf scorch.
  • Low Light Adaptability: Jade plants can survive in lower light, but growth will be slower and leggier.

Tip: Rotate the pot occasionally to encourage even growth and prevent the plant from leaning toward the light source.


Watering the Jade Plant

Overwatering is the most common mistake jade plant owners make. Since they are succulents, jade plants need less water than most houseplants.

  • When to Water: Let the top 1–2 inches of soil dry out completely before watering.
  • Watering Frequency:
    • In spring and summer (active growth): water every 2–3 weeks.
    • In fall and winter (dormant season): water once a month or less.
  • How to Water: Water deeply until excess drains from the bottom, but never let the pot sit in water.

Warning: Yellow, mushy leaves are a sign of overwatering, while wrinkled, dry leaves indicate underwatering.


Soil and Potting

Jade plants need well-draining soil to prevent root rot.

  • Best Soil Mix: Use a cactus or succulent potting mix. You can also make your own by mixing:
    • 2 parts regular potting soil
    • 1 part perlite or coarse sand
  • Container Choice: Choose a pot with drainage holes. Terra-cotta pots are ideal as they absorb moisture and keep roots dry.

Repotting Tip: Repot every 2–3 years in spring to refresh the soil and give roots more space. Jade plants prefer slightly snug pots.


Temperature and Humidity

One of the jade plant’s best features is its ability to adapt to different climates.

  • Temperature Range: Thrives between 65°F–75°F (18°C–24°C) but can tolerate as low as 50°F (10°C).
  • Humidity: Jade plants prefer dry air and don’t need extra humidity. Avoid placing them in overly damp rooms.
  • Outdoors: In frost-prone regions, bring jade plants indoors during winter as they are not frost-tolerant.

Fertilizing Your Jade Plant

Jade plants don’t require heavy feeding but benefit from occasional fertilizer.

  • Fertilizer Type: Use a balanced, water-soluble fertilizer diluted to half strength or a cactus/succulent fertilizer.
  • Feeding Schedule:
    • During the growing season (spring and summer): once every 4–6 weeks.
    • During dormancy (fall and winter): skip feeding.

Note: Over-fertilizing can burn roots and cause weak growth.


Pruning and Shaping

Pruning helps maintain a jade plant’s shape and encourages branching.

  • When to Prune: In spring or early summer.
  • How to Prune: Use sterilized scissors or pruning shears to remove leggy stems, dead leaves, or overgrown branches.
  • Shaping: You can train jade plants into bonsai-style trees by pruning carefully and wiring stems.

Propagation Made Easy

Jade plants are among the easiest houseplants to propagate, making them perfect for sharing with friends or expanding your garden.

Propagation Methods:

  1. Leaf Cuttings:
    • Remove a healthy leaf, let it callus for 1–2 days, then place it on well-draining soil.
    • Mist occasionally until new roots and tiny leaves appear.
  2. Stem Cuttings:
    • Cut a healthy stem 3–4 inches long.
    • Allow it to dry for a day, then plant it in soil.
    • Within weeks, roots will develop, and a new plant will grow.

Tip: Propagation works best during spring or summer when the plant is actively growing.


Will Jade Plants Flower?

Yes, jade plants can bloom with clusters of tiny white or pink star-shaped flowers, though it is rare indoors. Blooming usually happens in winter under the right conditions:

  • Provide lots of sunlight.
  • Reduce watering in late fall.
  • Keep in cooler night temperatures (around 55°F/13°C).

Common Problems and Solutions

Even though jade plants are hardy, they may encounter issues if not cared for properly.

  1. Wrinkled, Shriveling Leaves – Underwatering. Increase watering slightly.
  2. Yellow, Mushy Leaves – Overwatering. Allow soil to dry before watering again.
  3. Leaf Drop – Sudden environmental changes, low light, or overwatering.
  4. Pests: Watch out for mealybugs, spider mites, and aphids. Treat with neem oil or insecticidal soap.

Benefits of Growing Jade Plants

  • Air Purification: Helps clean indoor air.
  • Low Maintenance: Perfect for beginners or busy people.
  • Longevity: Can live for decades, becoming part of your family tradition.
  • Symbolism: Attracts prosperity, luck, and positive energy.

Final Thoughts

The jade plant is more than just a beautiful succulent—it’s a symbol of resilience, good luck, and enduring beauty. By providing bright light, well-draining soil, careful watering, and occasional feeding, you can keep your jade plant thriving anywhere, anytime. Whether you want a low-maintenance office desk plant, a striking bonsai centerpiece, or a symbolic home companion, the jade plant is an excellent choice.

With just a little attention, this green gem will reward you with lush foliage and maybe even delicate blooms—making it one of the most rewarding houseplants you’ll ever grow.

5 Hardy Plants for Clay Soil That Thrive in Challenging Gardens

5 Hardy Plants for Clay Soil That Thrive in Challenging Gardens

Clay soil is often considered one of the most challenging types of soil for gardeners. Its heavy texture, poor drainage, and tendency to become compacted can make it difficult for many plants to thrive. However, clay soil isn’t all bad—it’s naturally rich in nutrients and can support a wide variety of hardy plants if you choose wisely. With the right selection, clay soil can become a thriving garden base filled with color, texture, and resilience.

In this article, we’ll explore five hardy plants for clay soil that not only survive but truly flourish in challenging conditions. Each plant is known for its adaptability, beauty, and ease of care, making them perfect for both beginner and experienced gardeners.


1. Daylilies (Hemerocallis)

Daylilies are one of the most dependable and vibrant perennials you can grow in clay soil. Known for their trumpet-shaped flowers and long blooming season, they add cheerful bursts of color to any garden.

Why They Thrive in Clay Soil:

Daylilies have strong, fibrous roots that penetrate compact soil, making them ideal for clay-heavy areas. They can tolerate poor drainage and even survive short periods of standing water.

Care Tips:

  • Sunlight: Plant in full sun for maximum blooms, though they tolerate partial shade.
  • Watering: Water deeply during dry spells, but avoid overwatering.
  • Maintenance: Deadhead spent flowers to encourage more blooms. Divide clumps every 3–4 years to keep them healthy.

Added Benefit:

Daylilies come in countless varieties and colors, so you can choose shades that match your garden’s theme. They’re also drought-tolerant once established, making them low-maintenance and reliable.


2. Coneflowers (Echinacea)

Coneflowers are hardy perennials that bring pollinator-friendly charm to clay soil gardens. With their daisy-like petals and prominent centers, they attract bees, butterflies, and birds.

Why They Thrive in Clay Soil:

Echinacea’s deep taproot system allows it to break through dense clay layers. Once established, they tolerate poor soil conditions and periods of drought.

Care Tips:

  • Sunlight: Full sun is best, though they tolerate light shade.
  • Watering: Provide moderate watering during the first growing season; afterward, they’re drought-resistant.
  • Maintenance: Cut back dead flower heads in late summer to encourage new growth or leave them for birds in winter.

Added Benefit:

Apart from being ornamental, Echinacea has medicinal uses and is often grown for its immune-boosting properties. Its long-lasting blooms also make excellent cut flowers.


3. Black-Eyed Susans (Rudbeckia hirta)

Black-Eyed Susans are bright, cheerful wildflowers that are incredibly resilient. Their golden-yellow petals with dark brown centers can light up any corner of your garden.

Why They Thrive in Clay Soil:

Rudbeckias are highly adaptable and can tolerate compact soils without losing vigor. They establish quickly and can handle both wet and dry spells, which are common in clay-heavy gardens.

Care Tips:

  • Sunlight: Grow in full sun for the best flowering.
  • Watering: Moderate watering is enough; they’re drought-tolerant once established.
  • Maintenance: Deadhead flowers to extend blooming time. They also self-seed, creating natural drifts over time.

Added Benefit:

Black-Eyed Susans provide nectar for pollinators and seeds for birds, making them perfect for wildlife-friendly gardens. Their bright blooms also look stunning in mixed flower beds.


4. Bee Balm (Monarda)

Bee Balm is a hardy perennial known for its spiky, vibrant flowers in shades of red, pink, purple, and white. Its aromatic leaves and pollinator-attracting blooms make it a favorite among gardeners.

Why They Thrive in Clay Soil:

Bee Balm tolerates clay soil well because it prefers moist, nutrient-rich environments. With proper spacing and care, it thrives even in heavy soils.

Care Tips:

  • Sunlight: Prefers full sun but can tolerate partial shade.
  • Watering: Keep the soil evenly moist but avoid waterlogging.
  • Maintenance: Prune back after flowering to encourage new blooms. Ensure good air circulation to prevent powdery mildew.

Added Benefit:

Bee Balm is a magnet for hummingbirds, butterflies, and bees. It also has culinary uses, as the leaves can be brewed into herbal tea.


5. Astilbe

If your clay soil garden has shady, moist areas, Astilbe is the perfect choice. Its feathery plumes of flowers in shades of pink, red, and white bring elegance and texture to the garden.

Why They Thrive in Clay Soil:

Astilbe enjoys consistently moist soil, which clay naturally provides. Its robust root system adapts well to heavy soils, especially in shady spots where drainage is slower.

Care Tips:

  • Sunlight: Partial shade to full shade is ideal.
  • Watering: Water regularly to keep the soil moist; mulch to retain moisture.
  • Maintenance: Cut back flower stalks after blooming and divide clumps every few years to rejuvenate growth.

Added Benefit:

Astilbe’s lush foliage remains attractive even after the flowers fade, making it a great plant for adding long-lasting interest to shady garden beds.


Tips for Gardening in Clay Soil

While the plants above are naturally suited to clay, a few simple steps can further improve your garden’s success:

  1. Improve Drainage with Organic Matter – Add compost, leaf mold, or well-rotted manure to lighten heavy clay and enhance aeration.
  2. Raised Beds or Mounds – For plants that need better drainage, elevate them slightly above the ground level.
  3. Mulching – Mulch helps retain moisture during dry spells and prevents surface crusting.
  4. Avoid Overwatering – Clay retains water longer, so always check soil moisture before watering.
  5. Test Soil pH – Clay soil is often alkaline; choose plants accordingly or amend the soil if needed.

Conclusion

Clay soil may seem challenging, but with the right approach and plant choices, it can become a garden filled with life and beauty. Plants like Daylilies, Coneflowers, Black-Eyed Susans, Bee Balm, and Astilbe are not only hardy but also add vibrant color and attract pollinators. By embracing the strengths of clay soil and selecting resilient species, you can transform your garden into a thriving landscape that requires minimal fuss and rewards you with long-lasting beauty.

How to Grow Tomato Plants for Juicy Harvests: A Complete Guide

How to Grow Tomato Plants for Juicy Harvests: A Complete Guide

Tomatoes are one of the most rewarding crops any gardener can grow. Their bright red fruits are not only delicious but also versatile, perfect for salads, sauces, and snacks straight off the vine. Whether you’re an experienced gardener or just starting out, growing tomato plants can be both enjoyable and fruitful when done correctly. With the right techniques, care, and attention, you can enjoy a bountiful harvest of juicy tomatoes right from your backyard, balcony, or garden bed.

This comprehensive guide will walk you through every step of tomato cultivation—from selecting the right variety and preparing the soil to planting, caring, and harvesting for the best results.


Why Grow Tomatoes?

Before diving into the how-to, it’s worth understanding why tomatoes are such a favorite among gardeners:

  • Nutrient-rich: Tomatoes are packed with vitamins A, C, and K, potassium, and antioxidants like lycopene.
  • Versatility in the kitchen: They can be eaten raw, cooked, roasted, dried, or blended into sauces and soups.
  • Easy to grow: With some sunlight, good soil, and care, tomatoes thrive in most climates.
  • Productive harvests: One healthy plant can yield dozens of fruits.

Step 1: Choosing the Right Tomato Variety

Tomatoes come in many shapes, sizes, and flavors. Picking the right variety is crucial depending on your growing conditions and taste preferences.

  1. Cherry Tomatoes – Small, sweet, and prolific producers. Perfect for beginners and container gardening.
  2. Beefsteak Tomatoes – Large and juicy, great for sandwiches and burgers.
  3. Roma (Plum) Tomatoes – Meaty texture, excellent for sauces and pastes.
  4. Heirloom Varieties – Unique in color and flavor, but often more delicate.
  5. Determinate vs. Indeterminate:
    • Determinate (bush type) grow to a set height and produce fruit all at once.
    • Indeterminate (vine type) grow continuously and produce throughout the season.

Tip: If you’re short on space, choose cherry or determinate types. If you want extended harvests, go for indeterminate varieties.


Step 2: Preparing the Soil

Tomatoes love nutrient-rich, well-draining soil with plenty of organic matter.

  • pH Range: Keep soil slightly acidic, between 6.0 and 6.8.
  • Amendments: Add compost, aged manure, or organic fertilizers before planting.
  • Drainage: Avoid waterlogged soil to prevent root rot. Raised beds or containers are excellent options for control.

Tip: Work in a handful of crushed eggshells or bone meal at planting time to provide extra calcium and prevent blossom end rot.


Step 3: Planting Tomato Seeds or Seedlings

You can start tomatoes either from seeds indoors or purchase young seedlings from a nursery.

Growing from Seeds:

  • Start seeds indoors 6–8 weeks before your region’s last frost date.
  • Use seed trays or small pots filled with seed-starting mix.
  • Provide warmth (70–75°F) and sufficient light—grow lights or a sunny windowsill.
  • Transplant seedlings outdoors when they are 6–10 inches tall and all danger of frost has passed.

Transplanting Seedlings:

  • Harden off seedlings by gradually exposing them to outdoor conditions for a week.
  • Plant deeply, burying two-thirds of the stem underground. Tomatoes develop roots along the buried stem, creating a stronger root system.
  • Space determinate plants 18–24 inches apart and indeterminate plants 24–36 inches apart.

Step 4: Providing the Right Growing Conditions

Tomatoes thrive when given the essentials:

  1. Sunlight – At least 6–8 hours of direct sunlight daily. More sun equals sweeter fruit.
  2. Temperature – Ideal growing temperature: 70–85°F during the day and above 55°F at night.
  3. Support Systems – Use stakes, cages, or trellises to keep plants upright and fruits off the ground.

Step 5: Watering and Mulching

Tomatoes need consistent watering to avoid stress and cracking fruits.

  • Watering: Deeply water 2–3 times per week, depending on weather. Avoid overhead watering—water at the base to prevent fungal diseases.
  • Mulching: Apply straw, grass clippings, or shredded leaves around the base to conserve moisture, regulate soil temperature, and suppress weeds.

Step 6: Fertilizing for Maximum Growth

Tomatoes are heavy feeders, so proper fertilization is key.

  • Before Planting: Mix compost or balanced fertilizer into the soil.
  • During Growth: Use a tomato-specific fertilizer or a mix rich in phosphorus and potassium but moderate in nitrogen. Too much nitrogen produces leafy plants with fewer fruits.
  • Schedule: Fertilize every 3–4 weeks once fruits set.

Step 7: Pruning and Maintenance

Regular maintenance ensures healthy plants and larger, tastier fruits.

  • Pruning Suckers: Pinch off small shoots (suckers) that develop between the main stem and branches. This directs energy toward fruit production.
  • Air Circulation: Trim lower leaves to improve airflow and reduce disease risks.
  • Weeding: Keep the area around your plants weed-free to prevent nutrient competition.

Step 8: Preventing Pests and Diseases

Tomatoes are prone to some common pests and diseases. Early detection is crucial.

  • Pests:
    • Aphids, whiteflies, and tomato hornworms.
    • Control using neem oil, insecticidal soap, or introducing beneficial insects like ladybugs.
  • Diseases:
    • Blight, powdery mildew, and blossom end rot.
    • Prevent by rotating crops, spacing plants properly, and avoiding water on leaves.

Tip: Companion planting with basil, marigold, or garlic helps deter pests naturally.


Step 9: Harvesting Tomatoes

One of the most rewarding stages is picking your tomatoes at peak ripeness.

  • When to Harvest: Fruits should be firm, evenly colored, and slightly soft to the touch.
  • Ripening Off the Vine: If frost threatens, pick green tomatoes and let them ripen indoors in a paper bag.
  • Continuous Harvest: Indeterminate varieties will keep producing until the first frost if well maintained.

Step 10: Storing and Using Your Harvest

  • Short-Term Storage: Keep ripe tomatoes at room temperature and consume within a few days. Refrigeration may reduce flavor.
  • Long-Term Preservation:
    • Freeze chopped tomatoes for sauces and stews.
    • Can or jar tomato sauces, pastes, and salsas.
    • Sun-dry or oven-dry slices for intense flavor.

Common Mistakes to Avoid

  1. Overwatering: Causes root rot and split fruits.
  2. Planting too close: Restricts airflow, increasing disease risks.
  3. Skipping support: Leads to broken stems and ground rot.
  4. Ignoring pruning: Can result in overcrowded, weak plants.
  5. Too much fertilizer: Especially nitrogen, delays fruiting.

Conclusion

Growing tomato plants may seem intimidating at first, but with proper guidance, it’s a highly rewarding journey. By selecting the right variety, preparing the soil, providing adequate sunlight and water, and maintaining your plants with care, you can enjoy a steady supply of juicy, flavorful tomatoes right at home. Whether you’re dreaming of fresh salads, homemade sauces, or simply the satisfaction of picking ripe tomatoes from your garden, this guide equips you with the knowledge to achieve abundant harvests.

So roll up your sleeves, plant those seeds, and get ready to enjoy the delightful taste of homegrown tomatoes. Your orchard of juicy harvests is only a season away!

How to Propagate Plants for Your Garden: A Complete Easy-to-Follow Guide

How to Propagate Plants for Your Garden: A Complete Easy-to-Follow Guide

Creating a lush and thriving garden doesn’t always require spending a fortune on new plants. One of the most rewarding and cost-effective ways to expand your green space is through plant propagation. This process involves creating new plants from existing ones—whether through seeds, cuttings, division, or layering. Not only does propagation save money, but it also allows you to preserve your favorite plant varieties, share them with friends, and enjoy the satisfaction of nurturing life from its earliest stages.

In this complete, easy-to-follow guide, we’ll walk through the different methods of plant propagation, the tools you’ll need, and tips to ensure your garden flourishes with healthy, vibrant plants.


Why Propagation is Essential for Gardeners

Before diving into techniques, it’s important to understand why propagation is such a valuable skill:

  • Cost-Effective Gardening – Instead of buying new plants, you can create dozens from one parent plant.
  • Preservation of Favorites – Keep your favorite plants growing year after year by propagating them before they decline.
  • Faster Results – Certain methods, such as cuttings, give you mature plants faster than growing from seed.
  • Sharing and Gifting – Propagated plants make thoughtful and eco-friendly gifts.
  • Sustainable Gardening – Reduces reliance on commercial nurseries and promotes self-sufficiency.

Tools You’ll Need for Propagation

Having the right tools makes propagation more efficient and increases success rates. Gather these essentials:

  • Sharp pruning shears or scissors – for taking cuttings.
  • Sterile knife or razor blade – for clean, disease-free cuts.
  • Small pots or seed trays – to plant cuttings, seeds, or divisions.
  • Potting mix or propagation soil – lightweight and well-draining.
  • Rooting hormone (optional) – encourages root development.
  • Spray bottle – keeps soil and cuttings moist without overwatering.
  • Clear plastic bag or dome – helps create a humid environment for root growth.

Methods of Plant Propagation

There are several ways to propagate plants, and each works best for specific species. Let’s explore the most common and effective methods.


1. Propagation by Seeds

Growing plants from seeds is the most traditional and straightforward method.

Steps:

  1. Collect seeds from mature plants or purchase high-quality ones.
  2. Prepare seed trays with a fine, well-draining seed-starting mix.
  3. Sow seeds according to their depth requirements (check packet instructions).
  4. Mist lightly with water and cover with a plastic dome or wrap to retain moisture.
  5. Place in a warm, sunny location or under grow lights.
  6. Once seedlings develop a few true leaves, transplant them into larger pots or directly into your garden.

Best Plants for Seed Propagation: Tomatoes, peppers, sunflowers, marigolds, beans, and zinnias.

Pro Tip: Some seeds, like lavender or certain trees, need stratification (a cold treatment) before germination.


2. Propagation by Cuttings

Cuttings are one of the fastest and most reliable methods, especially for houseplants and shrubs.

Steps:

  1. Select a healthy parent plant.
  2. Using clean shears, cut a 4–6 inch stem just below a leaf node.
  3. Remove lower leaves, keeping only the top 2–3 leaves.
  4. Dip the cut end in rooting hormone (optional but effective).
  5. Plant the cutting in a small pot with moist potting mix.
  6. Cover with a plastic bag to maintain humidity.
  7. Place in indirect sunlight and mist regularly.

Best Plants for Cuttings: Pothos, rosemary, basil, coleus, geraniums, and succulents.

Pro Tip: Softwood cuttings root faster than hardwood cuttings, so timing matters depending on the plant type.


3. Propagation by Division

Division is ideal for perennials and plants that grow in clumps.

Steps:

  1. Uproot the plant gently, ensuring you don’t damage the root system.
  2. Shake off excess soil to expose the roots.
  3. Use a knife or your hands to separate the clump into smaller sections, each with roots and shoots.
  4. Replant each section into fresh soil and water thoroughly.

Best Plants for Division: Hostas, daylilies, irises, ornamental grasses, and aloe vera.

Pro Tip: Divide plants during their dormant season (spring or fall) for best results.


4. Propagation by Layering

Layering encourages a stem to produce roots while still attached to the parent plant.

Steps:

  1. Select a low-hanging branch.
  2. Bend it to the ground and cover a portion with soil, leaving the tip exposed.
  3. Secure it with a stone or garden pin.
  4. Water regularly until roots form (usually a few weeks to months).
  5. Cut the rooted section from the parent plant and replant it separately.

Best Plants for Layering: Jasmine, hydrangeas, blackberries, and ivy.

Pro Tip: Air layering can be used for woody plants—wrapping a stem section in moist moss until roots form.


5. Propagation by Grafting and Budding

Though more advanced, grafting and budding are powerful techniques to combine traits from two plants.

Steps (Grafting):

  1. Select a healthy rootstock and a scion (the plant you want to propagate).
  2. Make precise cuts so both pieces fit together snugly.
  3. Bind tightly with grafting tape.
  4. Keep in a humid, shaded environment until the union heals.

Best Plants for Grafting: Fruit trees like apples, citrus, and cherries.

Pro Tip: Grafting requires patience and practice but allows gardeners to grow multiple varieties on a single tree.


Tips for Successful Plant Propagation

  • Always use clean, sterile tools to prevent diseases.
  • Avoid direct harsh sunlight for cuttings and seedlings; indirect light is ideal.
  • Keep soil slightly moist, but never soggy.
  • Be patient—some plants root quickly, while others may take months.
  • Label each propagation attempt so you can track progress.

Common Mistakes to Avoid

  • Overwatering – Roots rot if soil is too wet.
  • Wrong medium – Heavy soil prevents root development.
  • Too much sunlight – Young cuttings dry out quickly under intense heat.
  • Neglecting air circulation – Stagnant air encourages mold growth.

Final Thoughts

Learning how to propagate plants is a valuable skill for any gardener, beginner or experienced. From the simple joy of watching seeds sprout to the thrill of seeing a cutting take root, propagation connects you more deeply with your garden. It allows you to create new greenery, expand your plant collection, and ensure your garden thrives with beauty and diversity—all while saving money and promoting sustainability.

Whether you’re starting with seeds, experimenting with cuttings, or trying your hand at grafting, each method opens the door to new gardening adventures. With patience, care, and the right techniques, your garden can flourish with plants that you’ve nurtured from the very beginning.

How to Care for a Peace Lily Plant Effectively

How to Care for a Peace Lily Plant Effectively

The Peace Lily (Spathiphyllum) is one of the most popular houseplants around the world, loved for its glossy green foliage, elegant white blooms, and incredible air-purifying qualities. This plant is often considered a beginner-friendly choice, yet it thrives best with a balance of proper care. Native to tropical rainforests of Central and South America, Peace Lilies bring not only beauty but also a sense of tranquility to indoor spaces.

If you’ve recently brought home a Peace Lily or are planning to, this complete guide will walk you through everything you need to know about its care—from light and water requirements to repotting, fertilization, and troubleshooting common problems.


1. Understanding the Peace Lily Plant

The Peace Lily belongs to the Araceae family and is not a true lily but a flowering plant known for its spathe (the large white “flower” that surrounds the spadix). Its blooms symbolize peace, purity, and healing, making it a popular gift for homes and offices. Beyond its symbolism, NASA studies have shown Peace Lilies help filter indoor air toxins such as benzene, carbon monoxide, and formaldehyde.

To care for a Peace Lily effectively, it’s important to mimic its natural tropical habitat, which is warm, humid, and shaded under rainforest canopies.


2. Light Requirements for Peace Lilies

Peace Lilies thrive in low to medium indirect light, making them perfect for indoor settings. However, the type and intensity of light they receive affects their growth and flowering.

  • Best light conditions: Bright, indirect light near a north- or east-facing window.
  • Avoid direct sunlight: Harsh sun can scorch the leaves, causing brown edges and spots.
  • Low light tolerance: While Peace Lilies survive in low light, they may produce fewer blooms.

Tip: If your plant hasn’t flowered in months, move it to a brighter spot with filtered light.


3. Watering Your Peace Lily

Peace Lilies are sensitive to both overwatering and underwatering, so finding the right balance is key.

  • Frequency: Water about once a week, but always check the soil first.
  • Soil check method: Insert your finger about an inch deep—if it feels dry, it’s time to water.
  • Signs of underwatering: Drooping, limp leaves. The good news is they usually recover quickly after watering.
  • Signs of overwatering: Yellowing leaves and root rot. Ensure the pot has drainage holes.

Pro Tip: Use filtered or distilled water, as Peace Lilies are sensitive to chlorine and fluoride commonly found in tap water.


4. Humidity and Temperature Needs

Since Peace Lilies are tropical plants, they prefer warm and humid environments.

  • Temperature range: 65°F to 80°F (18°C to 27°C).
  • Avoid extremes: Keep them away from cold drafts, heaters, and air conditioners.
  • Humidity levels: Moderate to high humidity is ideal.

Ways to maintain humidity:

  • Place the plant on a pebble tray filled with water.
  • Mist the leaves occasionally.
  • Group Peace Lilies with other houseplants to create a humid microclimate.

5. Soil and Potting Mix

Peace Lilies require well-draining soil that retains some moisture but doesn’t stay soggy.

  • Ideal mix: A peat-based potting mix with perlite or sand for aeration.
  • Repotting: Every 1–2 years when the plant outgrows its container. Signs include roots growing out of drainage holes or compacted soil.

When repotting, choose a pot 1–2 inches larger than the current one. Avoid oversized pots, as they can hold too much water and cause root rot.


6. Fertilization and Feeding

To keep your Peace Lily lush and encourage blooms, fertilization is necessary.

  • Type of fertilizer: A balanced, water-soluble houseplant fertilizer (10-10-10 or 20-20-20).
  • Frequency: Every 6–8 weeks during spring and summer (the growing season).
  • Avoid overfertilization: Too much fertilizer can cause brown leaf tips or prevent flowering.

Note: Peace Lilies usually bloom best when given proper feeding and light.


7. Pruning and Cleaning

Peace Lilies benefit from regular grooming to stay healthy and attractive.

  • Pruning: Cut off yellow, brown, or wilted leaves at the base to encourage new growth.
  • Deadheading blooms: Once the white flower turns green or brown, snip it off at the base of the stem.
  • Cleaning leaves: Wipe dust from leaves with a damp cloth to help with photosynthesis.

This routine care also keeps pests like spider mites and aphids away.


8. Propagation of Peace Lilies

Peace Lilies are best propagated through division, not cuttings.

Steps for propagation:

  1. Remove the plant from its pot.
  2. Gently separate clumps of leaves with roots attached.
  3. Plant each clump into its own pot with fresh soil.
  4. Water well and place in a shaded, warm area.

This method allows you to create multiple healthy plants from one mother plant.


9. Common Problems and Solutions

Even though Peace Lilies are low-maintenance, they can face issues if neglected.

  • Brown leaf tips: Often caused by fluoride in water, low humidity, or overfertilization. Use distilled water and mist leaves regularly.
  • Yellowing leaves: Can signal overwatering, poor drainage, or nutrient deficiency.
  • No blooms: Insufficient light or lack of fertilization. Move to a brighter location and feed regularly.
  • Pests: Watch out for spider mites, mealybugs, and aphids. Wipe leaves with soapy water or use neem oil.
  • Root rot: Prevent by ensuring well-drained soil and not letting the pot sit in water.

10. Benefits of Growing a Peace Lily

Aside from being beautiful, Peace Lilies provide several benefits:

  • Air purification: Removes toxins like benzene, trichloroethylene, and formaldehyde.
  • Boosts humidity: Helps in dry indoor environments, especially during winters.
  • Stress relief: Their calming appearance promotes a sense of well-being.
  • Symbolic value: Represent peace, healing, and harmony.

Conclusion

The Peace Lily is more than just a decorative plant—it’s a living air filter and a calming presence in your home. By providing the right care in terms of light, water, humidity, soil, and pruning, your plant will reward you with healthy growth and stunning white blooms throughout the year.

Whether you are a beginner or an experienced plant lover, mastering Peace Lily care is easy once you understand its tropical needs. With a little consistency, this plant can thrive for years, beautifying your indoor space and adding a touch of serenity.

5 Creative Island Flower Beds to Elevate Your Landscape Style

5 Creative Island Flower Beds to Elevate Your Landscape Style

A beautiful garden isn’t just about the plants you grow—it’s about how you arrange and present them. One of the most captivating and versatile landscaping ideas is the island flower bed. Unlike traditional flower beds that hug fences, walls, or pathways, an island bed sits independently in the middle of your lawn or yard, like a small oasis of color and texture. These garden islands create a natural focal point, adding structure and interest to your outdoor space while allowing for creative plant groupings.

In this guide, we’ll explore five creative island flower bed designs that can completely transform your landscape. Whether you’re looking for a vibrant splash of color, a serene green escape, or a functional centerpiece, these ideas will inspire you to create a stunning garden island that suits your style.


1. The Circular Oasis Island Bed

If you love symmetry and balance in your garden, the circular island flower bed is a timeless choice. Its shape naturally draws attention from all sides, making it ideal for large lawns or open spaces.

To design a circular oasis, start by choosing a central focal point, such as a small ornamental tree, a tall shrub, or even a garden statue. Around this centerpiece, layer flowering plants of different heights. For example, tall plants like coneflowers or hollyhocks can frame the middle, medium-height blooms such as lavender or geraniums can form the middle ring, and low-growing groundcovers like creeping thyme can border the edge.

The key is to plant in concentric circles, creating a ripple of colors and textures that flow outward. This design not only looks lush but also makes your garden visually accessible from any angle. To enhance its impact, surround the island with neatly trimmed grass or even a gravel border to highlight its shape.

A circular oasis is perfect for homeowners who want their garden to feel harmonious and organized, while still bursting with natural beauty.


2. The Wildflower Meadow Island Bed

For those who prefer a low-maintenance, eco-friendly option, the wildflower meadow island bed is a brilliant idea. Instead of neatly arranged plants, this design embraces a natural, free-flowing look by using native wildflowers and grasses.

To create this island, select a mix of wildflowers like black-eyed Susans, daisies, coreopsis, and bee balm, combined with ornamental grasses like switchgrass or fountain grass. Not only will this provide vibrant seasonal color, but it will also attract pollinators such as butterflies, bees, and hummingbirds to your garden.

This style requires minimal upkeep since wildflowers thrive without excessive watering or fertilization. It’s also highly sustainable, making it a great choice if you’re interested in biodiversity. For extra charm, you can edge the island with natural stone or driftwood, giving it a rustic, meadow-like appearance.

A wildflower meadow island is perfect for gardeners who value natural beauty, wildlife, and effortless charm in their landscape.


3. The Tropical Paradise Island Bed

If you dream of turning your backyard into a mini-vacation retreat, the tropical island flower bed will make your wish come true. This design focuses on bold, lush foliage and vibrant flowers that mimic the feel of a tropical getaway.

Start by selecting plants with large leaves and dramatic shapes, such as elephant ears, banana plants, or canna lilies. Add in bright, exotic flowers like hibiscus, bird of paradise, or ginger for eye-catching pops of color. Surround these with lush groundcovers like caladiums or ferns to soften the edges.

For added flair, you can incorporate decorative rocks, tiki torches, or even a small water feature like a birdbath or fountain. This creates an immersive tropical vibe that feels like a natural escape.

The tropical paradise island bed thrives best in warmer climates but can also be adapted in cooler regions by using container plants that can be brought indoors during winter.

This design is ideal for homeowners who love luxury, drama, and a resort-like feel in their backyard.


4. The Rock Garden Island Bed

For a unique twist, consider designing a rock garden island bed. Rocks and stones add natural texture and structure, making your island stand out even when flowers aren’t in bloom. This type of bed is especially suited for dry or sloped areas where traditional flower beds might be harder to maintain.

Start by arranging different sizes of rocks to form a natural mound. Then, fill in spaces with drought-tolerant plants like sedums, succulents, lavender, or ornamental grasses. These hardy plants thrive in rocky conditions and require little water, making this design both practical and beautiful.

To make the island more eye-catching, use contrasting colors—light-colored stones paired with vibrant blooms or darker rocks paired with silver-leaved plants like lamb’s ear. You can also add creeping plants that spill over rocks for a more natural look.

The rock garden island bed is perfect for those who want a low-maintenance yet artistic feature that blends seamlessly with the landscape.


5. The Seasonal Showcase Island Bed

If you love the idea of a garden that looks different with every season, the seasonal showcase island bed is the best choice. This design focuses on planting a variety of flowers and shrubs that bloom at different times of the year, ensuring that your island is always alive with color.

For spring, you can plant tulips, daffodils, and hyacinths. In summer, fill the island with roses, daylilies, and zinnias. For autumn beauty, add chrysanthemums, asters, and ornamental kale. And for winter interest, include evergreen shrubs, holly, or red-twig dogwood.

To enhance the seasonal appeal, consider adding decorative elements that can be swapped out—like lanterns, seasonal garden stakes, or even small sculptures that reflect holidays or special occasions.

This island bed keeps your landscape dynamic and ever-changing, offering something new to admire every time you step into your garden.


Tips for Designing Stunning Island Flower Beds

No matter which design you choose, here are a few universal tips to make your island flower bed truly shine:

  1. Location Matters – Place your island where it will be visible from different parts of your garden or home.
  2. Height Arrangement – Always plant taller plants in the center and shorter ones around the edges for a layered effect.
  3. Color Harmony – Choose a color palette that complements your landscape, whether it’s bold contrasts or soft pastels.
  4. Edging and Borders – Define your island with edging stones, bricks, or decorative mulch to make it stand out.
  5. Maintenance – Choose plants suited to your climate and lifestyle so that your island bed remains easy to care for.

Conclusion

Island flower beds are more than just patches of plants—they are artistic statements that bring structure, character, and vibrancy to your outdoor space. Whether you prefer the elegance of a circular oasis, the free-spirited charm of a wildflower meadow, the bold look of a tropical retreat, the natural texture of a rock garden, or the ever-changing beauty of a seasonal showcase, there’s an island bed style to suit every gardener’s vision.

By thoughtfully selecting plants, arranging layers, and adding creative touches, you can transform your lawn into a landscape masterpiece that reflects your personality. An island flower bed isn’t just about beautifying your yard—it’s about creating a living centerpiece that continues to grow, evolve, and delight year after year.

So, grab your gardening tools, pick your favorite design, and start crafting your own island of beauty today!

5 Lush Hanging Plants That Instantly Beautify Your Room

5 Lush Hanging Plants That Instantly Beautify Your Room

Indoor gardening is one of the most rewarding ways to bring life and freshness into your home. While potted plants add greenery to tables and shelves, nothing transforms a room more dramatically than lush hanging plants. Suspended greenery softens sharp corners, fills empty spaces, and creates a cascading effect that elevates any interior. These plants are not only beautiful but also practical—they save space, improve indoor air quality, and add a touch of nature to your living environment.

In this article, we’ll explore five lush hanging plants that can instantly beautify your room while being relatively easy to care for. Whether you’re a beginner or a seasoned plant parent, these picks are sure to add charm, greenery, and style to your indoor oasis.


1. Golden Pothos (Epipremnum aureum)

Golden pothos is one of the most popular and low-maintenance hanging plants you can bring indoors. Known for its heart-shaped leaves splashed with golden-yellow patterns, this plant creates stunning trailing vines that can easily drape from shelves, baskets, or wall-mounted planters.

Why It’s Perfect for Hanging Spaces:
Golden pothos grows quickly and adapts to various conditions. Its cascading vines can extend several feet, creating a lush curtain of greenery. You can even train the vines to climb walls, poles, or trellises for added creativity.

Care Tips:

  • Light: Thrives in bright, indirect light but tolerates low light.
  • Water: Water once the top inch of soil feels dry. Avoid overwatering, as pothos dislikes soggy soil.
  • Extra Tip: Trim vines occasionally to encourage fuller growth and propagate cuttings in water for new plants.

Why You’ll Love It:
Golden pothos is both decorative and functional—it’s known for its air-purifying qualities, removing toxins like formaldehyde and benzene from the air. It’s an ideal choice if you want lush greenery with minimal fuss.


2. String of Pearls (Senecio rowleyanus)

If you want a plant that feels whimsical and unique, the string of pearls is a showstopper. Its long, trailing stems are covered in bead-like, spherical leaves that resemble little green pearls. This succulent creates a striking, cascading effect perfect for hanging planters.

Why It’s Perfect for Hanging Spaces:
The pearls spill gracefully over the edges of pots, making it look like a living curtain of jewels. This plant is a conversation starter and instantly adds elegance to modern, bohemian, or minimalist interiors.

Care Tips:

  • Light: Needs bright, indirect light or filtered sunlight. Place it near a sunny window.
  • Water: Water sparingly. Being a succulent, it stores moisture in its leaves, so it’s drought-tolerant. Let the soil dry out completely before watering again.
  • Extra Tip: Use a well-draining cactus or succulent mix to prevent root rot.

Why You’ll Love It:
This plant adds both greenery and texture to your space. Its unusual form creates a sense of movement, and with proper care, it can produce small white flowers with a pleasant cinnamon-like fragrance.


3. Boston Fern (Nephrolepis exaltata)

For those who love a lush, tropical vibe, the Boston fern is a classic choice. With its arching fronds and feathery texture, it’s one of the best hanging plants to fill a room with vibrant greenery.

Why It’s Perfect for Hanging Spaces:
Boston ferns create a dramatic, full look that instantly softens and brightens corners or empty ceilings. Their bushy growth makes them perfect for large hanging baskets.

Care Tips:

  • Light: Prefers indirect light. Too much direct sunlight can scorch the fronds.
  • Water: Keep soil consistently moist, but not waterlogged. Mist regularly, as Boston ferns thrive in humidity.
  • Extra Tip: Place near bathrooms or use a humidifier for best results.

Why You’ll Love It:
Boston ferns are excellent natural humidifiers and air purifiers. Their refreshing green foliage makes any room feel like a tropical escape, perfect for creating a calm and relaxing atmosphere.


4. Spider Plant (Chlorophytum comosum)

The spider plant is another household favorite known for its arching green-and-white striped leaves. This hardy plant not only looks stunning in a hanging pot but also produces baby plantlets, or “spiderettes,” that dangle gracefully from the mother plant.

Why It’s Perfect for Hanging Spaces:
The cascading leaves and dangling spiderettes make it one of the most decorative hanging plants. It adds dimension and charm to corners, hallways, and even kitchens.

Care Tips:

  • Light: Prefers bright, indirect light but adapts to low-light conditions.
  • Water: Water when the top inch of soil dries. Spider plants are forgiving if you forget occasionally.
  • Extra Tip: Repot spiderettes into new pots to multiply your collection or share with friends.

Why You’ll Love It:
Spider plants are incredibly resilient and beginner-friendly. They are also proven air-purifiers, making them not only decorative but also healthy additions to your living space.


5. English Ivy (Hedera helix)

English ivy is a timeless trailing plant that adds a sophisticated touch to any room. Its dark green, glossy leaves and fast-growing vines make it a striking choice for hanging baskets.

Why It’s Perfect for Hanging Spaces:
The trailing vines of English ivy can easily be trained along walls, windows, or hanging planters. It’s perfect for creating a dramatic, cascading effect that makes your room feel lush and inviting.

Care Tips:

  • Light: Prefers bright, indirect light but can tolerate medium light.
  • Water: Keep soil slightly moist, but avoid overwatering. Ensure the pot has proper drainage.
  • Extra Tip: Prune regularly to prevent overgrowth and keep the plant looking neat.

Why You’ll Love It:
English ivy’s timeless beauty adds elegance to any space. It’s also a natural air purifier, helping to reduce indoor pollutants. With its versatile growth, you can let it cascade or train it into creative shapes.


Tips for Styling Hanging Plants Indoors

  • Choose the Right Container: Opt for lightweight, durable hanging baskets with good drainage.
  • Mix and Match: Combine different plants with varying leaf shapes and colors for a layered, lush effect.
  • Height Matters: Hang plants at different levels to create visual interest and depth in your room.
  • Pair with Décor: Use macramé hangers, ceramic pots, or woven baskets to match your interior style.
  • Rotate Regularly: Turn your plants occasionally to ensure even growth and exposure to light.

Final Thoughts

Hanging plants are more than just decorative—they’re a way to bring nature closer, purify your air, and elevate the aesthetic of your home. From the resilient Golden Pothos and whimsical String of Pearls to the tropical Boston Fern, hardy Spider Plant, and elegant English Ivy, each of these lush hanging plants offers unique charm.

By carefully choosing and styling your hanging plants, you can instantly beautify your room, fill it with greenery, and enjoy the calming presence of nature indoors. Whether you’re looking for low-maintenance options or bold statement greenery, these five picks will help you create an inviting and refreshing living space.