How to Prevent Spider Mites in Indoor Plants

How to Prevent Spider Mites in Indoor Plants

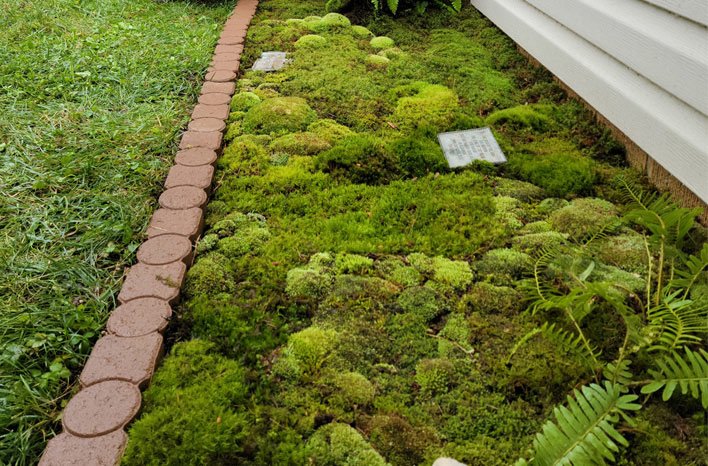
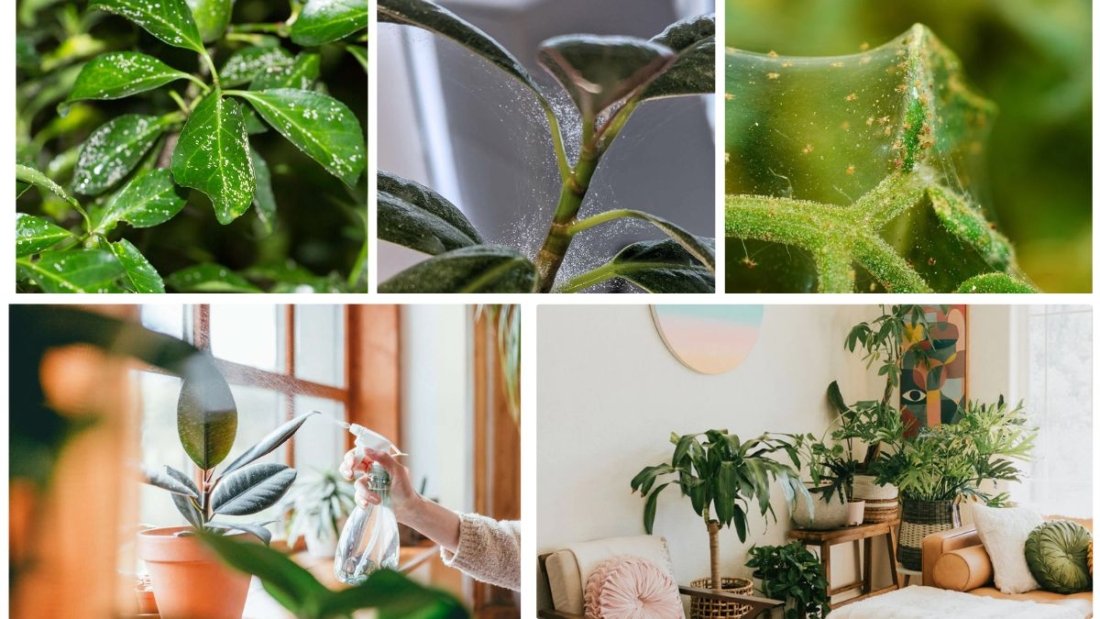
Indoor plants bring beauty, fresh air, and a sense of calm into our homes. However, they can sometimes fall victim to tiny yet troublesome pests like spider mites. These microscopic arachnids are a common problem for houseplant enthusiasts, and if not managed early, they can cause significant damage to your plants. The good news is that preventing spider mites is much easier than dealing with a full-blown infestation. With the right care, environment, and proactive steps, you can keep your indoor plants thriving and spider-mite-free.

This guide covers everything you need to know about preventing spider mites in your indoor plants, from recognizing early signs to adopting simple care routines.


Understanding Spider Mites

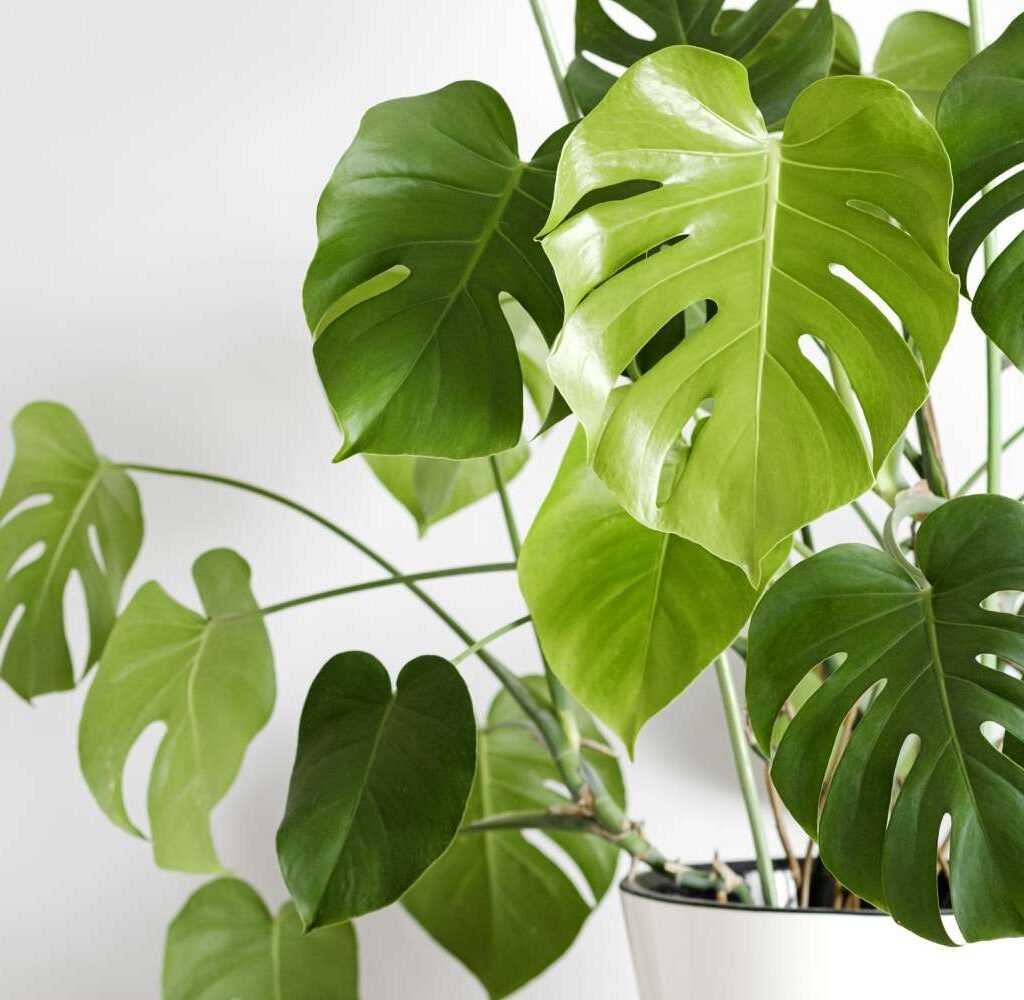
Spider mites are part of the arachnid family, closely related to spiders and ticks. They are extremely small—often less than 1 mm long—and can be red, brown, or pale green. These pests thrive in warm, dry environments and multiply quickly, making them one of the most common indoor plant problems.

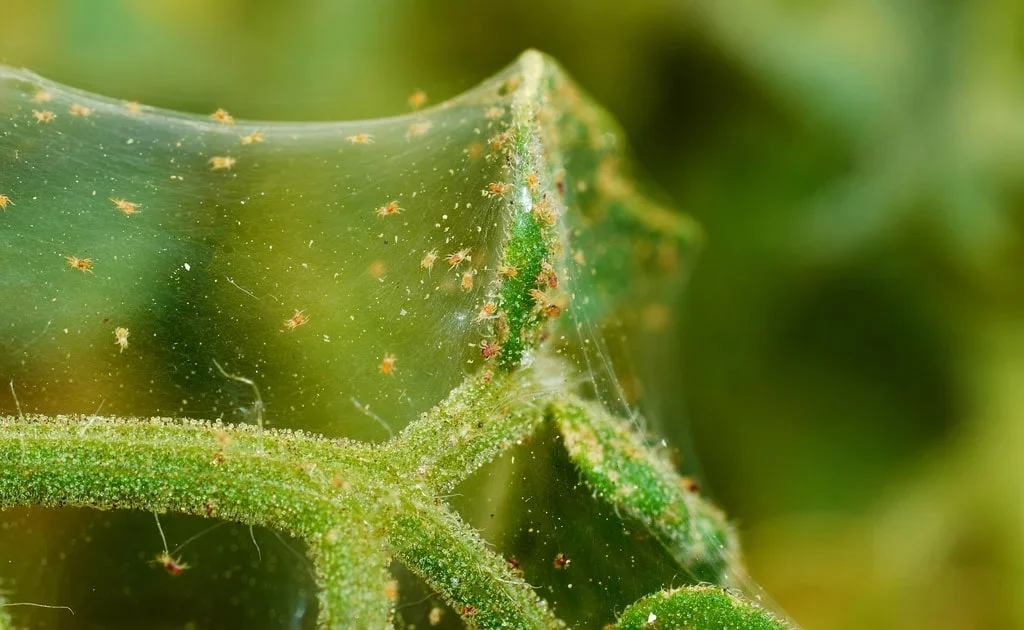
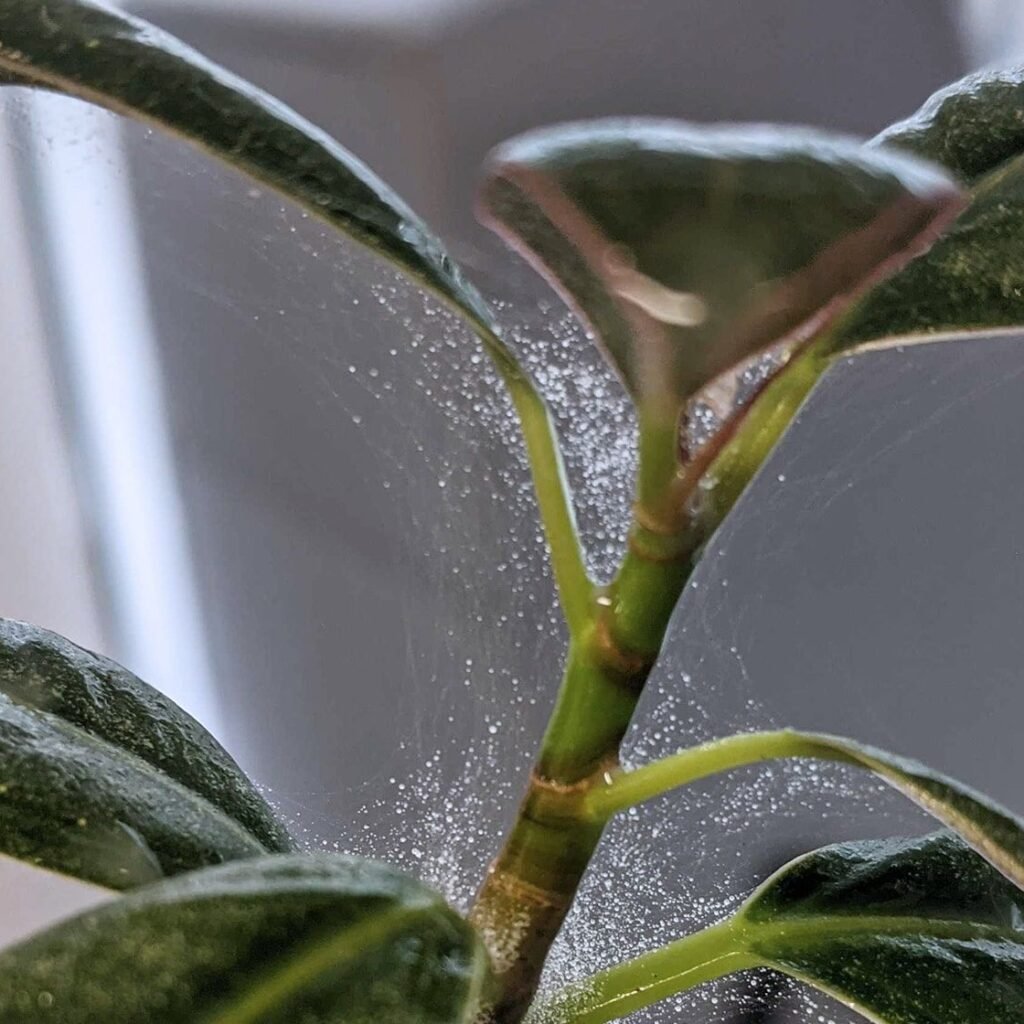
They feed by piercing plant leaves and sucking out their sap. This weakens the plant, causing yellow speckles, curling leaves, and eventually leaf drop. In severe infestations, you might notice delicate webbing between leaves or stems—a sure sign of spider mites at work.


Why Prevention Matters

Once spider mites establish themselves, they can spread rapidly to other plants. Treating infestations often requires repeated cleaning, isolating plants, or even discarding severely affected ones. Prevention saves time, money, and stress while keeping your plant collection healthy.


Step 1: Choose the Right Environment

Spider mites thrive in hot, dry conditions, which makes prevention largely about creating a less favorable environment for them.

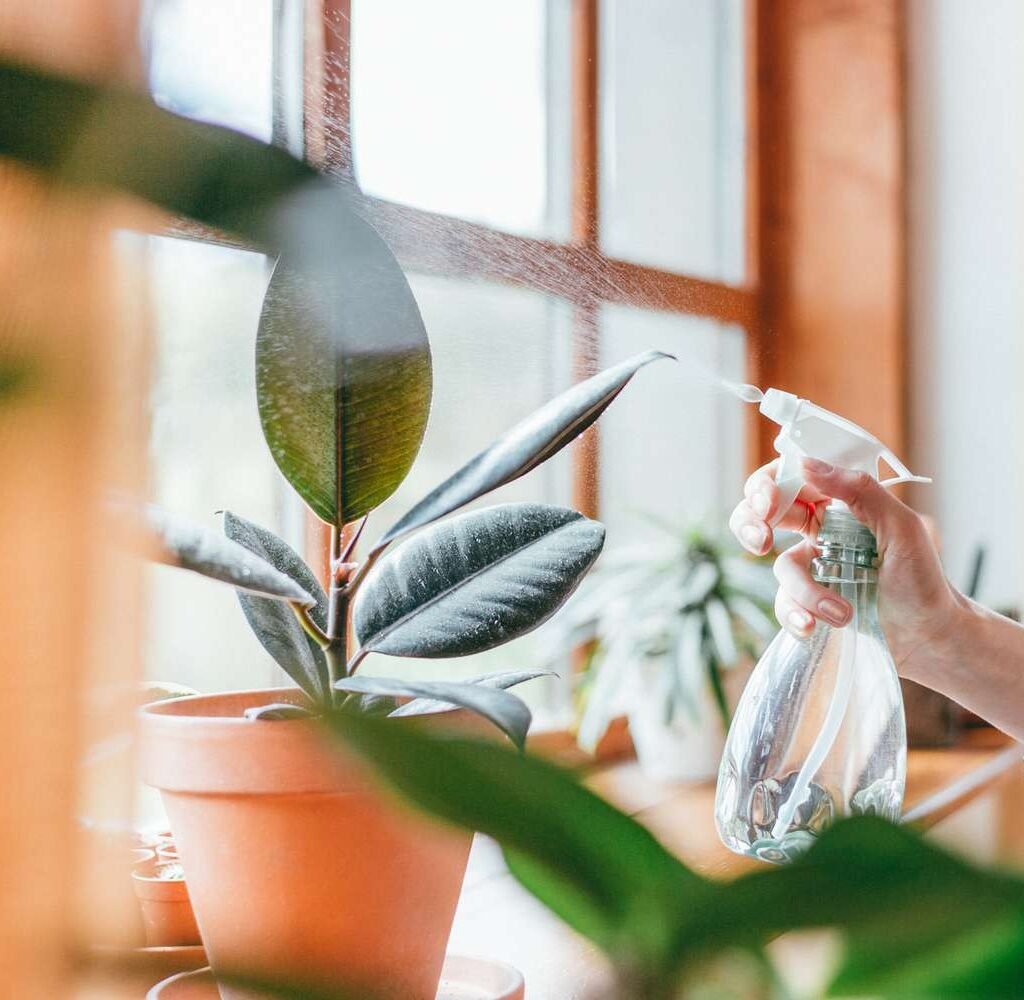
  • Maintain proper humidity: Use a humidifier in rooms with indoor plants or group plants together to increase local humidity. Misting plants lightly can help, though it should be done carefully to avoid mold.
  • Avoid excessive heat: Keep plants away from heaters, radiators, or vents that dry out the air.
  • Provide proper air circulation: Good airflow discourages mites. A small fan on a low setting can help without disturbing plants.

Step 2: Regular Plant Inspections

Catching spider mites early is key. Make it a habit to check your plants weekly.

  • Check leaf undersides: Spider mites often hide beneath leaves.
  • Look for early symptoms: Yellow or stippled spots on leaves, tiny moving dots, or fine webbing indicate their presence.
  • Use a magnifying glass: Because of their size, a magnifying glass can help identify them accurately.

Early detection allows you to intervene before an infestation spreads.


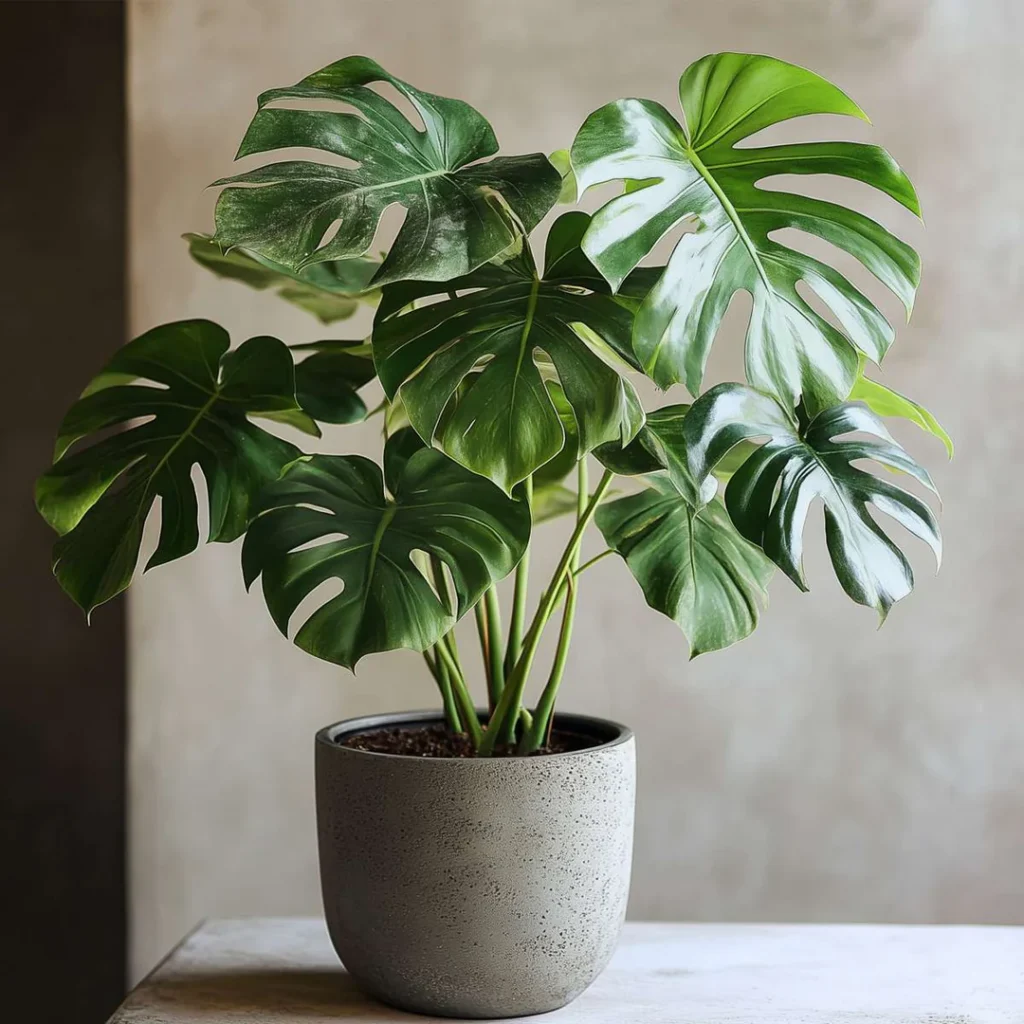
Step 3: Keep Plants Clean

A clean plant is less attractive to pests. Regular cleaning also removes dust, which can give spider mites a comfortable environment.

  • Wipe leaves: Use a damp, soft cloth to gently wipe both sides of leaves.
  • Rinse plants: Place smaller plants in the shower or sink and rinse them with lukewarm water once every few weeks.
  • Prune damaged leaves: Remove any heavily affected leaves promptly to reduce the risk of spread.

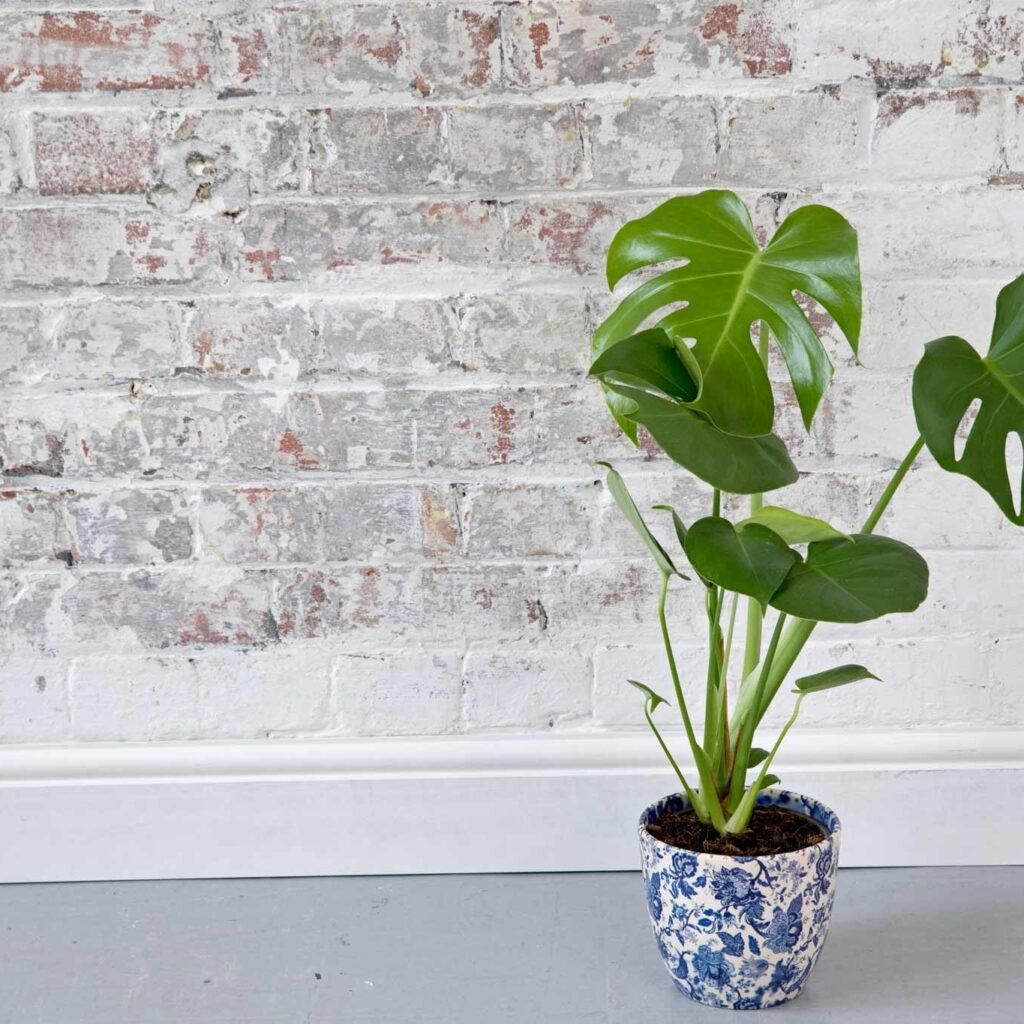
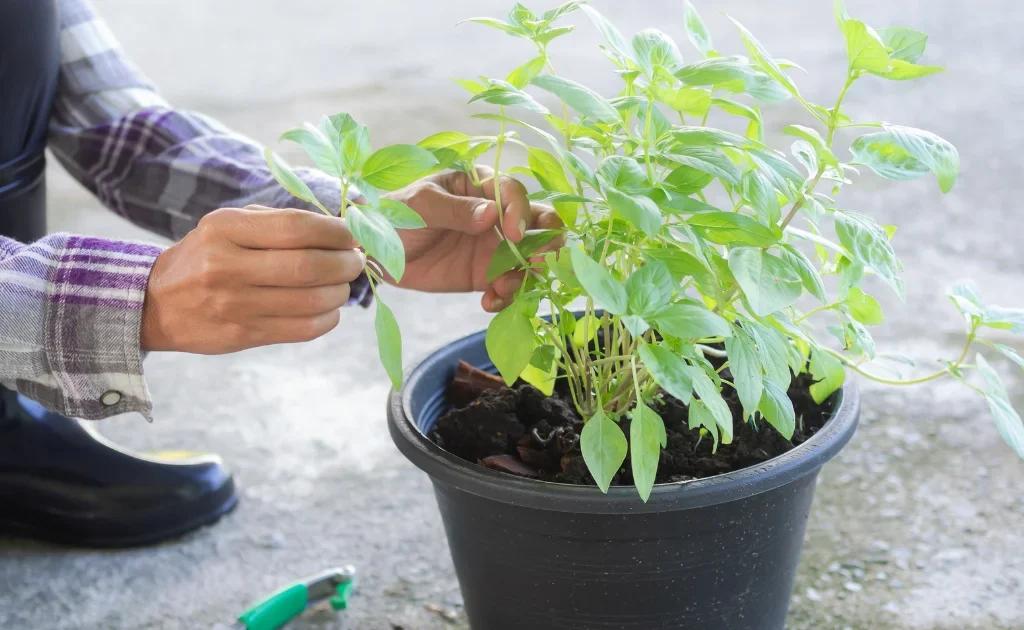
Step 4: Quarantine New Plants

New plants are one of the most common sources of spider mite infestations. Before adding them to your collection:

  • Isolate for 2–3 weeks: Place new plants in a separate room and observe them closely.
  • Inspect thoroughly: Check for mites, eggs, or other pests before introducing them to your main plant group.

Step 5: Watering and Nutrition Balance

Healthy plants are less vulnerable to pests. Stress from under-watering, over-watering, or poor nutrition can make them more susceptible.

  • Avoid water stress: Spider mites thrive on plants weakened by dryness. Keep soil consistently moist, but not soggy.
  • Fertilize wisely: Use a balanced fertilizer appropriate for each plant type. Over-fertilizing can promote tender new growth that attracts pests.

Step 6: Natural Preventive Sprays

Some natural sprays can help keep spider mites at bay without harming your plants.

  • Neem oil: A natural insecticide and miticide, neem oil deters pests and prevents reproduction. Dilute and spray every few weeks as a preventive measure.
  • Insecticidal soap: Safe for most indoor plants, insecticidal soap disrupts mites’ protective coatings.
  • Homemade solutions: A mild mix of water and dish soap (1 teaspoon per quart of water) can be sprayed on leaves to deter mites.

Always test sprays on a small section of the plant before full application.


Step 7: Introduce Beneficial Insects

While this works best outdoors or in greenhouse setups, some beneficial insects can control spider mites naturally.

  • Predatory mites (like Phytoseiulus persimilis) feed on spider mites and keep populations in check.
  • Ladybugs and lacewing larvae also target mites if your setup allows for them.

Though not practical for every indoor gardener, it’s a useful option for larger plant collections.


Step 8: Seasonal Care Adjustments

Spider mites are more active in certain conditions, so adjusting your care seasonally can make a difference.

  • Winter: Indoor heating reduces humidity, creating ideal conditions for mites. Increase humidity and monitor closely.
  • Summer: Plants may dry out faster; ensure consistent watering and regular inspections.

Common Mistakes to Avoid

  • Ignoring dust buildup: Dusty leaves are prime real estate for spider mites.
  • Overuse of pesticides: Harsh chemicals can harm plants, beneficial insects, and even your health. Prevention is better than aggressive treatment.
  • Skipping quarantine: Adding new plants directly to your collection without inspection is a leading cause of infestations.

Conclusion

Spider mites may be tiny, but the damage they cause can be enormous if left unchecked. Fortunately, with proper care, consistent monitoring, and a few preventive strategies, you can protect your indoor plants from these persistent pests. By maintaining humidity, cleaning leaves, quarantining new plants, and using natural deterrents, your plants will remain vibrant, healthy, and pest-free.

Remember, prevention is always easier than cure when it comes to plant care. A little extra effort now will save you the frustration of dealing with an infestation later. With these easy yet effective steps, you’ll be well on your way to keeping your indoor oasis thriving and spider-mite-free.

How to Grow Oak Trees from Acorns at Home

How to Grow Oak Trees from Acorns at Home

Oak trees are magnificent symbols of strength, longevity, and natural beauty. From providing shade to supporting wildlife, they are among the most valuable trees you can grow. While most people admire oaks in large landscapes and forests, few realize that they can actually grow these majestic trees right at home—starting from something as simple as an acorn. Growing oak trees from acorns is not only a rewarding gardening project but also a way to contribute to ecological balance and future generations.

In this guide, we’ll walk you through everything you need to know about growing oak trees from acorns at home, from collecting and preparing acorns to planting, caring, and nurturing your tree into maturity.


Why Grow Oak Trees from Acorns?

Growing oak trees from acorns offers numerous benefits:

  • Cost-effective: Acorns are free and abundant during fall.
  • Satisfying process: Watching an acorn transform into a towering oak tree is deeply fulfilling.
  • Environmental value: Oaks provide oxygen, shelter, and food for countless species, including birds, squirrels, and insects.
  • Long-term legacy: Planting an oak is like planting history—it can live for centuries, becoming a landmark for future generations.

Step 1: Collecting Acorns

The first step is gathering healthy acorns. This usually happens in autumn (September–November) when oak trees naturally drop their seeds.

  • Choose the right tree: Look for mature oak trees in your area. Common varieties include white oak, red oak, and live oak.
  • Select healthy acorns: Pick acorns that are brown, firm, and free of cracks or holes. Avoid green, moldy, or damaged ones, as these are unlikely to sprout.
  • Gather more than you need: Not all acorns will germinate, so it’s best to collect several for higher chances of success.

Pro Tip: Acorns that fall later in the season tend to be more mature and viable.


Step 2: Sorting and Testing Acorns

Once you’ve gathered your collection, you’ll need to sort and test them to ensure they are viable.

  • The float test: Place acorns in a bowl of water. The ones that sink are likely healthy, while those that float are hollow or damaged and should be discarded.
  • Remove caps: Oak acorns often fall with their caps. Removing the cap won’t harm the seed but helps you examine its condition better.
  • Check for pests: Small holes indicate insect infestations—discard these acorns immediately.

Step 3: Storing and Stratifying Acorns

Some oak acorns can sprout immediately after collection, while others require cold stratification (a chilling period that mimics winter conditions).

  • White oak acorns: These germinate quickly and don’t need long storage. Plant them soon after collection.
  • Red oak acorns: These require a dormancy period of 1–3 months before germination.

How to stratify acorns:

  1. Place acorns in a plastic bag with slightly moist peat moss, sawdust, or sand.
  2. Store the bag in a refrigerator (34–40°F or 1–4°C).
  3. Check monthly to ensure moisture is consistent but not soggy.
  4. Look for root sprouts after 6–12 weeks.

Step 4: Planting Acorns

After acorns are prepared, it’s time to plant them. You can start indoors in pots or directly outdoors in your garden.

Planting in Pots (Recommended for Beginners)

  1. Choose a deep pot or container (oak roots grow long taproots).
  2. Fill with nutrient-rich, well-draining potting soil.
  3. Plant acorns 1–2 inches deep, with the pointed end facing down.
  4. Water lightly and keep soil moist but not waterlogged.
  5. Place in a sunny spot indoors or outdoors, depending on climate.

Planting Directly Outdoors

  1. Select a permanent spot with enough space (oaks can spread 50–100 feet).
  2. Dig a small hole and plant the acorn about 1–2 inches deep.
  3. Cover with soil and water gently.
  4. Protect the spot with chicken wire or mesh to keep squirrels and birds away.

Step 5: Germination and Early Care

Acorns usually sprout in 2–6 weeks, depending on the type of oak and growing conditions. Here’s how to care for the seedlings:

  • Light: Place seedlings in bright, indirect light if indoors. Outdoors, partial sunlight is ideal at first.
  • Watering: Keep soil moist but avoid overwatering. Young oaks don’t like soggy roots.
  • Temperature: Maintain moderate temperatures. Protect from frost in early stages.
  • Protection: Use small cages or covers outdoors to prevent damage from animals.

Step 6: Transplanting Young Oak Trees

When your oak seedling reaches 8–12 inches tall and has a healthy taproot, it’s ready for transplanting outdoors.

  • Timing: Transplant in early spring or autumn when the weather is mild.
  • Site selection: Choose a location with full sun and enough room for long-term growth.
  • Transplanting process:
    1. Dig a hole deep enough for the entire root system.
    2. Place the seedling in the hole, ensuring the root collar is at ground level.
    3. Backfill with soil and press gently to remove air pockets.
    4. Water thoroughly after planting.

Step 7: Long-Term Oak Tree Care

Growing oak trees is a long-term commitment. With proper care, your oak can thrive for centuries.

  • Watering: Young oaks need consistent watering for the first 2–3 years. After that, they are drought-tolerant.
  • Mulching: Apply mulch around the base to retain moisture and protect roots. Avoid piling mulch against the trunk.
  • Pruning: Light pruning in the first few years helps shape the tree. Avoid heavy pruning as it can damage growth.
  • Fertilizing: Oaks don’t require much fertilizer. A balanced organic compost once a year in spring can boost growth.
  • Pest protection: Watch for pests like oak borers or fungal diseases. Healthy trees are generally resistant.

Common Challenges When Growing Oak Trees

  1. Squirrels and wildlife stealing acorns – Use mesh covers or plant extra acorns.
  2. Poor germination rates – Always collect more acorns than needed.
  3. Taproot damage during transplanting – Handle carefully; oak seedlings rely on their taproot.
  4. Slow growth – Oaks are naturally slow growers but incredibly strong and resilient over time.

Benefits of Having an Oak Tree at Home

  • Shade and cooling: Large oaks provide natural cooling for homes and gardens.
  • Wildlife habitat: Birds, insects, and small mammals rely on oaks for food and shelter.
  • Soil improvement: Oak leaves enrich soil as they decompose.
  • Legacy tree: Planting an oak means leaving behind a living legacy for future generations.

Conclusion

Growing oak trees from acorns at home is more than just gardening—it’s a journey of patience, care, and environmental stewardship. From collecting acorns in the fall to watching them sprout and thrive into majestic trees, the process connects us to nature in the most authentic way.

Whether you start with a handful of acorns in a pot or plant them directly into the ground, the rewards are immense. Each oak tree you nurture contributes to cleaner air, a richer ecosystem, and a greener legacy for years to come.

So this season, grab a few acorns and begin your journey. With care and dedication, your backyard could one day host a mighty oak, standing tall as a testament to your efforts.

Growing Potatoes from Kitchen Leftovers Made Easy

Growing Potatoes from Kitchen Leftovers Made Easy

Potatoes are one of the most versatile and widely consumed vegetables across the world. From mashed potatoes to fries, curries, and soups, they’re an essential part of daily meals. The good news is that you don’t always need to buy seed potatoes or invest heavily in gardening supplies to grow them. With just some kitchen leftovers, you can start your very own potato garden at home. This not only helps reduce waste but also provides you with fresh, chemical-free harvests right from your backyard, balcony, or even containers.

This article provides a comprehensive, step-by-step guide on growing potatoes from kitchen scraps, along with tips for care, pest management, and maximizing your harvest.


Why Grow Potatoes from Kitchen Leftovers?

  1. Cost-Effective – You can save money by reusing sprouted potatoes or peelings instead of purchasing seed potatoes.
  2. Waste Reduction – Instead of throwing away old or sprouted potatoes, you give them new life.
  3. Fresh and Healthy Harvest – Homegrown potatoes are free from harmful chemicals and pesticides.
  4. Beginner-Friendly – Potatoes are hardy plants and easy to grow, even for new gardeners.
  5. Space-Saving Options – You can grow them in the ground, raised beds, containers, or even grow bags.

Choosing the Right Kitchen Leftovers

Not every leftover potato will produce a successful crop. Here’s what you should look for:

  • Sprouted Potatoes (Eyes): The little shoots or “eyes” on older potatoes are ideal for planting.
  • Healthy Peelings: If your potato peels contain at least one or two eyes, they can be planted directly.
  • Avoid Rotten Potatoes: Do not use moldy or mushy potatoes, as they can spread diseases to the soil.
  • Best Varieties: Any potato variety works, but thin-skinned varieties like red or fingerling potatoes sprout more easily compared to thick-skinned russets.

Step-by-Step Guide to Growing Potatoes from Kitchen Leftovers

Step 1: Select and Prepare the Potatoes

  • Choose sprouted potatoes with strong, healthy shoots.
  • If using whole potatoes, cut them into smaller chunks, ensuring each piece has at least one or two eyes.
  • Let the cut pieces air dry for 24–48 hours to form a protective layer that prevents rotting in the soil.

Step 2: Choose Your Growing Spot

Potatoes need:

  • Sunlight – At least 6–8 hours of direct sun daily.
  • Soil – Loose, well-draining soil enriched with compost. Heavy clay soil should be avoided.
  • Container Option – If space is limited, grow in large buckets, grow bags, or wooden crates.

Step 3: Planting

  • Dig a shallow trench (about 4–6 inches deep) in the garden bed or prepare your container with soil.
  • Place potato pieces with the eyes facing upward.
  • Space them about 10–12 inches apart for proper root and tuber development.
  • Cover lightly with soil and water gently.

Step 4: Hilling (Essential for Growth)

  • As the potato plant grows to about 6–8 inches tall, mound soil around the base, covering the lower stems.
  • Repeat this process every 2–3 weeks until the plants flower.
  • Why? – Hilling prevents potatoes from being exposed to sunlight (which turns them green and toxic) and encourages more tuber production.

Step 5: Watering and Feeding

  • Watering – Keep the soil evenly moist but not soggy. Potatoes need about 1–2 inches of water per week.
  • Fertilization – Add organic compost, well-rotted manure, or a balanced fertilizer to support healthy growth. Avoid excess nitrogen, as it promotes leafy growth over tuber development.

Step 6: Pest and Disease Management

  • Common Pests: Potato beetles, aphids, and cutworms. Remove by hand or use organic sprays like neem oil.
  • Diseases: Blight and rot can affect plants. Ensure proper spacing, avoid waterlogging, and rotate crops yearly.

Step 7: Harvesting

  • Potato plants typically mature in 10–12 weeks for early varieties and up to 16–20 weeks for maincrop varieties.
  • You’ll notice the foliage turning yellow and dying back — this signals harvest time.
  • Gently dig into the soil with a fork or hands to avoid damaging the potatoes.

Step 8: Storing Your Harvest

  • Cure potatoes by laying them in a cool, dark, and dry place for about 1–2 weeks to toughen their skin.
  • Store in a ventilated bag or basket in a dark, cool location (not in the refrigerator).

Tips for Success

  1. Use Grow Bags for Easy Harvesting – Just dump the soil and pick out the potatoes without digging.
  2. Mulching – Adding straw or mulch helps retain soil moisture and reduce weeds.
  3. Companion Planting – Plant potatoes with beans, corn, or cabbage for natural pest control.
  4. Rotate Crops – Avoid planting potatoes in the same soil year after year to reduce disease risks.
  5. Harvest Baby Potatoes Early – You can gently remove small potatoes without disturbing the plant for continuous growth.

Common Mistakes to Avoid

  • Overwatering – Leads to rot and fungal diseases.
  • Planting Green or Rotten Potatoes – Reduces chances of growth and can infect healthy soil.
  • Not Hilling – Results in fewer and sunburned (green) potatoes.
  • Poor Sunlight – Leads to weak plants with little to no harvest.

Benefits of Homegrown Potatoes from Leftovers

  • Zero Waste Gardening – Makes use of food scraps.
  • Sustainability – Reduces reliance on store-bought produce.
  • Healthier Choices – No chemicals, pesticides, or preservatives.
  • Fun Family Project – Kids especially enjoy watching potatoes sprout and grow underground.

Conclusion

Growing potatoes from kitchen leftovers is one of the simplest and most rewarding gardening projects you can try. With minimal effort and space, you can transform sprouted potatoes or even potato peelings into a thriving crop of fresh, delicious tubers. By following the proper planting, watering, hilling, and harvesting steps, you’ll enjoy an abundant, chemical-free harvest that’s both sustainable and satisfying.

Whether you have a large garden, a balcony, or just a small container, growing potatoes from scraps is a beginner-friendly way to step into gardening and contribute to a greener lifestyle.

How to Grow Moss for a Natural Garden Touch

How to Grow Moss for a Natural Garden Touch

Gardening often celebrates bright blooms, lush greenery, and carefully designed arrangements. Yet, sometimes, the quiet beauty of subtle textures leaves the most lasting impression. Moss is one such element. With its soft, velvety carpet-like growth, moss can transform any space into a serene, natural oasis. Whether you want to create a fairy-tale-inspired garden, a peaceful Zen corner, or a lush green cover in shaded areas where grass refuses to grow, moss is a wonderful choice.

Unlike traditional plants, moss has unique growing requirements and characteristics. It doesn’t produce flowers, seeds, or true roots but instead thrives on minimal resources. Growing moss in your garden or even indoors is surprisingly simple once you understand its needs. This guide will walk you through everything you need to know about growing moss for that natural, enchanting touch.


Why Grow Moss in Your Garden?

  1. Low Maintenance Beauty
    Moss requires little upkeep compared to other plants. Once established, it doesn’t need frequent watering or fertilizing.
  2. Thrives in Shade
    If you have shaded spots where grass and flowers struggle, moss will happily fill the gap with lush greenery.
  3. Eco-Friendly and Sustainable
    Moss improves air quality, helps retain moisture, and prevents soil erosion without needing harmful chemicals.
  4. Aesthetic Appeal
    Moss adds a soft, timeless charm to gardens, stone paths, walls, and containers, making spaces feel natural and inviting.
  5. Resilience
    Because moss doesn’t have true roots, it survives in areas with compacted soil, rocky patches, or even bare stone.

Understanding Moss: The Basics

Mosses are non-vascular plants belonging to the Bryophyte family. Instead of roots, they have rhizoids—tiny structures that anchor them to surfaces. They absorb water and nutrients directly through their leaves, which is why they thrive in damp, humid environments.

  • Light Preference: Moss prefers indirect or dappled light. Direct sun can scorch it.
  • Moisture Needs: Consistent humidity is key; moss thrives in damp conditions.
  • Soil Requirements: Moss can grow on poor soil, stones, bricks, and logs, provided the surface is acidic and compact.
  • Propagation: Moss reproduces through spores, not seeds, which spread easily in moist environments.

Types of Moss to Grow

  1. Sheet Moss (Hypnum moss)
    • Forms flat, carpet-like mats.
    • Ideal for ground cover, rock gardens, and shaded lawns.
  2. Cushion Moss (Leucobryum moss)
    • Grows in dome-shaped, fluffy clumps.
    • Perfect for decorative garden corners or Zen gardens.
  3. Fern Moss (Thuidium delicatulum)
    • Resembles tiny ferns with its feathery texture.
    • Looks stunning on walls and shaded areas.
  4. Spoon-leaved Moss (Bryum capillare)
    • Distinct spoon-shaped leaves.
    • Good for rock gardens and container displays.
  5. Rock Cap Moss (Dicranum moss)
    • Thrives on rocks and logs.
    • Excellent for natural landscaping.

How to Grow Moss at Home

1. Choose the Right Location

  • Pick a shaded or semi-shaded area in your garden.
  • Ensure the spot stays consistently moist but not waterlogged.
  • Ideal places include under trees, near water features, along pathways, or shaded rock gardens.

2. Prepare the Surface

  • Moss grows best on compact, acidic soil or hard surfaces like stones and bricks.
  • Remove existing plants, weeds, or grass.
  • Compact the soil by pressing it down with a board or by walking over it.
  • Check the soil pH; moss prefers slightly acidic conditions (pH 5.0–6.0). You can lower soil pH using sulfur or peat moss.

3. Propagating Moss

a. Transplanting Moss

  • Collect moss from a healthy patch in your yard or purchase from a nursery.
  • Lay the moss pieces flat on the prepared surface.
  • Press them firmly into place so the rhizoids make contact with the soil or surface.
  • Mist with water to help moss settle.

b. Moss Slurry Method

  • Blend moss fragments with water and a small amount of buttermilk or plain yogurt.
  • Pour or paint this slurry onto rocks, walls, or soil where you want moss to grow.
  • Keep the area moist until moss establishes.

4. Watering and Humidity

  • Mist the moss regularly, especially during dry spells, to maintain moisture.
  • Moss absorbs water through its leaves, so consistent humidity is crucial.
  • If indoors, place moss in terrariums or shallow trays and use a spray bottle for watering.

5. Patience is Key

  • Moss grows slowly. It may take weeks to months before you see dense, lush coverage.
  • Avoid walking on moss while it’s establishing, as it may damage the delicate rhizoids.

Caring for Moss After Establishment

  1. Watering
    • Keep moss consistently moist, especially in dry or hot weather.
    • In humid climates, natural moisture may be enough.
  2. Weed Control
    • Remove weeds and grass that might compete with moss for space.
  3. Cleaning Moss Surfaces
    • If moss grows on stone pathways or walls, occasionally rinse debris like leaves to keep it looking fresh.
  4. No Fertilizers Needed
    • Moss does not need fertilizers. In fact, excess nutrients can harm it.
  5. Winter Care
    • Moss tolerates cold temperatures well. In fact, it often stays green when grass and other plants go dormant.

Creative Ways to Use Moss in Your Garden

  1. Moss Lawns
    Replace traditional lawns with moss for a lush, eco-friendly, and low-maintenance alternative.
  2. Moss on Rocks and Walls
    Apply moss slurry on garden rocks, statues, or walls for a natural, aged appearance.
  3. Moss Pathways
    Line shaded pathways with moss to create a fairy-tale look.
  4. Terrariums and Containers
    Grow moss in glass terrariums, dish gardens, or bonsai arrangements for indoor greenery.
  5. Water Features
    Surround ponds, fountains, or waterfalls with moss for a natural, calming effect.
  6. Zen or Meditation Gardens
    Cushion moss and sheet moss are often used in Japanese Zen gardens to create a serene, contemplative environment.

Troubleshooting Common Moss Problems

  • Moss Turning Brown: This usually means it’s drying out. Increase watering and humidity.
  • Moss Not Spreading: Ensure the surface is acidic, shaded, and compact. Adjust conditions if necessary.
  • Moss Lifting from Soil: Press it down firmly again and mist with water to help it reattach.
  • Invasive Plants Taking Over: Weed regularly to prevent moss from being overshadowed.

Benefits of Growing Moss

  1. Aesthetic Charm: Creates a natural, calming atmosphere.
  2. Eco-Friendly: Requires no fertilizers, pesticides, or mowing.
  3. Water Conservation: Needs less water than traditional lawns.
  4. Biodiversity Support: Provides habitat for small insects and supports micro-ecosystems.
  5. Year-Round Green: Moss stays green through all seasons, even in winter.

Conclusion

Growing moss is a rewarding way to add a natural, timeless beauty to your garden. Its lush, velvety greenery not only enhances aesthetics but also contributes to a more eco-friendly landscape. With its low maintenance needs, ability to thrive in shade, and endless creative uses, moss is a gardener’s secret to achieving that enchanting, serene touch.

Whether you dream of a moss-covered stone wall, a soft green lawn alternative, or a miniature moss terrarium indoors, the process is simple: give it shade, moisture, and patience. Over time, moss will reward you with its magical charm, turning your garden into a tranquil sanctuary.

Indoor Monstera Plant Care for Beginners

Indoor Monstera Plant Care for Beginners

Monstera plants, often called the Swiss Cheese Plant due to their unique split and hole-filled leaves, are among the most popular houseplants worldwide. Their tropical look, fast growth, and easy care make them a perfect choice for both beginners and experienced gardeners. If you’ve recently brought home a Monstera or are considering adding one to your indoor collection, learning how to care for it properly will ensure it thrives for years.

This guide provides step-by-step instructions on indoor Monstera plant care, covering everything from choosing the right spot to watering, feeding, pruning, and troubleshooting common problems.


Why Choose a Monstera Plant?

Before diving into care tips, let’s understand why Monsteras are so beloved:

  • Low maintenance: They adapt well to indoor conditions.
  • Air-purifying: Monsteras help filter toxins, improving air quality.
  • Aesthetic appeal: Their iconic split leaves bring a tropical, stylish vibe.
  • Long-lived: With the right care, they can grow for decades.

For beginners, these features make the Monstera a forgiving and rewarding choice.


Choosing the Right Location

Monsteras are tropical plants native to Central and South America, where they thrive under filtered jungle light. Indoors, replicating this environment is key.

  • Light: Place your Monstera in bright, indirect light. Direct sunlight can scorch its leaves, while too little light slows growth and reduces leaf splits. A spot near an east- or north-facing window works best.
  • Temperature: Keep them in a warm room (65–85°F / 18–29°C). They don’t tolerate frost, so avoid cold drafts from windows or air conditioners.
  • Humidity: Monsteras love humidity, ideally 60% or more. If your indoor air is dry, use a humidifier or place a tray of water near the plant.

Tip: If leaves start yellowing or looking droopy, check light and temperature conditions first.


Soil Requirements

The right soil mix is crucial for strong root growth and preventing rot.

  • Best mix: A loose, well-draining soil rich in organic matter. A blend of potting soil, peat moss or coco coir, and perlite works perfectly.
  • Drainage: Always use pots with drainage holes. Monsteras dislike sitting in water.

This setup mimics their natural jungle environment where roots grow in loose, airy soil.


Watering Your Monstera

Watering mistakes are one of the most common beginner problems.

  • Frequency: Water when the top 2 inches of soil feel dry. This is usually once a week in summer and every 10–14 days in winter.
  • Method: Water thoroughly until water drains from the bottom of the pot, then discard excess.
  • Signs of overwatering: Yellow leaves, soggy soil, or root rot.
  • Signs of underwatering: Crispy brown edges and droopy leaves.

Consistency is key—Monsteras prefer even moisture, not extremes.


Fertilizing for Healthy Growth

Monsteras are relatively fast growers and benefit from extra nutrients during the growing season.

  • Fertilizer type: Use a balanced, water-soluble houseplant fertilizer (e.g., 20-20-20).
  • Frequency: Feed every 4–6 weeks in spring and summer. Reduce or stop fertilizing in fall and winter when growth slows.
  • Tip: Over-fertilizing can burn roots. Always follow instructions on the fertilizer label.

Pruning and Training

Monsteras can grow quite large indoors, so pruning and training help keep them manageable and attractive.

  • Pruning: Trim back leggy stems or damaged leaves with clean scissors. This encourages fuller growth.
  • Support: Provide a moss pole or trellis as Monsteras are natural climbers. They’ll attach aerial roots for support.
  • Propagation: Cuttings from pruned stems with nodes can be rooted in water or soil to grow new plants.

This not only keeps your Monstera in shape but also allows you to share plants with friends.


Repotting Monsteras

As Monsteras grow, they outgrow their pots.

  • When to repot: Every 2–3 years or when roots peek out of drainage holes.
  • Pot size: Choose a pot 2–3 inches larger in diameter than the old one.
  • Repotting benefits: Provides fresh soil and space for healthy growth.

Common Problems and Solutions

Even with good care, Monsteras may face some issues. Here’s how to handle them:

  1. Yellowing leaves
    • Cause: Overwatering or poor drainage.
    • Fix: Check soil moisture, improve drainage, reduce watering.
  2. Brown leaf tips or edges
    • Cause: Low humidity or underwatering.
    • Fix: Increase humidity with a humidifier or misting.
  3. Slow or no leaf splitting
    • Cause: Insufficient light.
    • Fix: Move to a brighter, indirect light spot.
  4. Pests (spider mites, scale, mealybugs)
    • Fix: Wipe leaves with neem oil or insecticidal soap. Regular leaf cleaning prevents infestations.

Seasonal Care Tips

  • Spring/Summer: Active growth season—water more often, fertilize monthly, and consider repotting if needed.
  • Fall/Winter: Growth slows—reduce watering, pause fertilizing, and protect from cold drafts.

Decorating with Monsteras

Beyond care, Monsteras are fantastic decor plants:

  • Place them in stylish planters to match your interior theme.
  • Use large Monsteras as statement plants in living rooms.
  • Pair with smaller plants like pothos or ferns for a lush jungle corner.

Their bold leaves instantly brighten indoor spaces and create a refreshing, natural feel.


Final Thoughts

Caring for a Monstera indoors doesn’t have to be complicated. By giving it bright, indirect light, well-draining soil, consistent watering, and occasional feeding, your plant will reward you with lush, iconic foliage. For beginners, it’s one of the most forgiving houseplants to learn with, making it a perfect choice to start your indoor gardening journey.

With a little attention and love, your Monstera will not only thrive but also transform your home into a vibrant, tropical haven.

How to Care for Air Plants and Keep Them Alive

How to Care for Air Plants and Keep Them Alive

Air plants, also known as Tillandsias, are fascinating little wonders of the plant world. Unlike most plants, they don’t need soil to survive. Instead, they absorb water and nutrients through their leaves from the air around them. This unique trait makes them incredibly versatile for home décor—whether displayed in terrariums, hanging globes, mounted on driftwood, or even attached to magnets.

But despite their hardy appearance, many beginners struggle with air plant care, often finding their plants drying out or failing to thrive. The good news? With a little understanding of their needs, you can keep your air plants alive, healthy, and beautiful for years.

This guide covers everything you need to know about caring for air plants, from watering and light to fertilization and troubleshooting common problems.


What Makes Air Plants Unique?

Air plants belong to the Bromeliad family, which includes over 600 Tillandsia species. They grow naturally in the forests, mountains, and deserts of Central and South America, clinging to trees, rocks, and cliffs.

Their uniqueness lies in:

  • Epiphytic growth: They don’t grow in soil but attach themselves to surfaces.
  • Trichomes: Tiny hair-like structures on their leaves that absorb moisture and nutrients.
  • Versatility: They can be displayed almost anywhere—on wood, glass, shells, or hanging arrangements.

Understanding these adaptations is key to keeping them alive at home.


1. Light Requirements

Proper lighting is essential for air plants to thrive.

Best Light Conditions:

  • Bright, indirect light is ideal. Place them near east or south-facing windows.
  • Outdoors, they love dappled sunlight under tree canopies.

What to Avoid:

  • Direct midday sun indoors can scorch their leaves.
  • Low light conditions may cause weak growth and eventual decline.

Tip: If you don’t have natural bright light, a fluorescent or LED grow light will work well.


2. Watering Air Plants

Watering is where most people go wrong with air plants. Unlike succulents, they need regular moisture to stay alive.

How to Water:

  • Soaking method: Submerge your air plant in room-temperature water for 20–30 minutes once a week.
  • Misting method: Mist lightly 2–3 times a week in between soakings, especially in dry climates.
  • Drying step: Always shake off excess water and let the plant dry upside down in a well-ventilated space. This prevents rot at the base.

Factors Affecting Watering:

  • Humidity: In humid climates, watering once a week may be enough. In dry homes, soak twice a week.
  • Air circulation: The better the airflow, the more often you’ll need to water.
  • Plant type: Silver-leaved Tillandsias (with more trichomes) are drought-tolerant, while greener varieties need more frequent hydration.

Tip: If leaves curl or feel crispy, your plant is thirsty. If they feel mushy, you may be overwatering.


3. Temperature and Humidity

Air plants prefer the same climate humans do—making them perfect indoor companions.

Ideal Conditions:

  • Temperature: 50–90°F (10–32°C). Avoid frost as it will kill them.
  • Humidity: 50–70% is best. In dry homes, mist regularly or place near a humidifier.

Tip: Bathrooms and kitchens with natural light are excellent spots for air plants because of the higher humidity.


4. Fertilizing Air Plants

While not strictly necessary, fertilizing boosts growth, encourages blooms, and helps pups (baby air plants) form.

Fertilizer Guide:

  • Use a bromeliad or air plant fertilizer diluted to 1/4 strength.
  • Apply once a month during watering.
  • Over-fertilizing can burn the leaves—less is more.

Tip: Fertilizer is especially important if you want your air plant to bloom and propagate.


5. Air Circulation

Air plants thrive in areas with good airflow. Stagnant air can encourage rot and fungal issues.

  • Place them in open containers rather than sealed terrariums.
  • Avoid leaving them in glass globes with no ventilation unless you take them out for regular airing and watering.

Tip: Think about where they grow in nature—high in trees with breezes constantly moving through. Mimic that environment for best results.


6. Grooming and Maintenance

To keep your air plants looking their best, occasional grooming is needed:

  • Remove dead leaves: Gently pull away brown, crispy leaves at the base.
  • Trim tips: If leaf ends dry out, trim with scissors (cut at an angle for a natural look).
  • Encourage pups: After blooming, air plants produce small offsets (pups). Once pups are 1/3 the size of the parent plant, you can gently separate them or let them clump together.

7. Display and Creative Ideas

Part of the fun of air plants is their versatility. You can display them almost anywhere, as long as they get the right light and air circulation.

Popular Display Ideas:

  • Mounted on driftwood or cork bark.
  • In geometric glass terrariums (with open sides).
  • Resting inside sea shells or crystals.
  • Hanging from string, macrame, or wire holders.
  • Attached to magnets for fridge or office décor.

Tip: Avoid placing air plants on copper surfaces, as copper is toxic to them.


8. Common Problems and Solutions

Even with the best care, issues can arise. Here’s how to troubleshoot:

  • Leaves turning brown or crispy: Underwatering or too much direct sun. Increase watering and move to indirect light.
  • Soft, mushy leaves: Overwatering or poor drying. Ensure thorough drying after soaking.
  • Plant not blooming: Needs more light or fertilizer.
  • Base turning black: Rot has set in. Remove affected leaves and improve airflow.

9. Life Cycle and Longevity

Air plants are perennial and can live for several years with proper care. Their life cycle includes:

  1. Growth phase: Produces healthy foliage for a few years.
  2. Blooming phase: Flowers once in its lifetime (blooms can last days to months depending on species).
  3. Reproduction phase: Produces pups after flowering.
  4. Clumping phase: Parent plant slowly dies, but the pups continue growing, forming a beautiful cluster.

Tip: Don’t panic when your plant starts dying after blooming—it’s part of their natural cycle. Focus on nurturing the pups.


10. Seasonal Care Adjustments

  • Summer: Increase watering frequency due to higher heat and evaporation.
  • Winter: Reduce watering, but keep humidity in check if indoor heating dries the air.
  • Spring/Fall: Fertilize more regularly to encourage blooming and growth.

Final Thoughts

Air plants may seem mysterious at first, but once you understand their natural needs, they are surprisingly easy to care for. The keys to success are:

  • Bright, indirect light
  • Consistent watering with proper drying
  • Good air circulation
  • Occasional feeding

By meeting these needs, you’ll not only keep your air plants alive but also watch them bloom, produce pups, and form stunning clumps that can last for years.

Air plants bring a unique, modern touch to home gardening. Whether perched in a seashell, hanging in a globe, or displayed on driftwood, these soil-free wonders are as versatile as they are beautiful. With a little love and care, your air plants will thrive and become a captivating centerpiece in your living space.

5 Small Ornamental Trees to Enhance Your Home Garden

5 Small Ornamental Trees to Enhance Your Home Garden

A home garden is not just a place to grow vegetables and flowers—it’s a sanctuary where beauty, serenity, and nature blend seamlessly. Among the many elements that can transform your garden into a truly enchanting space, ornamental trees play a remarkable role. They bring structure, year-round beauty, and in many cases, fragrance, fruit, or seasonal blooms that elevate the charm of your outdoor environment.

For homeowners with limited space, small ornamental trees are the perfect solution. Unlike large shade trees that may dominate the landscape, these compact species fit gracefully into smaller yards, patios, or even container gardens, while still offering striking visual appeal.

In this article, we’ll explore five small ornamental trees that can instantly enhance your home garden, each chosen for their aesthetic value, adaptability, and low-maintenance care requirements.


1. Japanese Maple (Acer palmatum)

Few ornamental trees capture attention quite like the Japanese Maple, renowned for its delicate, lace-like leaves and striking seasonal colors.

Features:

  • Height: Typically grows 10–20 feet tall, making it ideal for smaller spaces.
  • Foliage: Known for its vibrant colors—fiery red, deep purple, orange, or even variegated green depending on the variety.
  • Seasonal Interest: Provides year-round appeal. Fresh green foliage in spring, brilliant shades in autumn, and unique branching structure in winter.

Why It’s Perfect for Home Gardens:

Japanese Maples thrive in partially shaded areas, making them excellent focal points in courtyards or near entryways. Their compact size ensures they don’t overshadow other garden elements. Many varieties can even be grown in containers, perfect for patios or balconies.

Care Tips:

  • Plant in well-draining, slightly acidic soil.
  • Protect from harsh afternoon sun to prevent leaf scorch.
  • Prune lightly in late winter to shape, but avoid heavy trimming.

If you want elegance and seasonal drama, the Japanese Maple is unmatched.


2. Crape Myrtle (Lagerstroemia indica)

A favorite in warm climates, the Crape Myrtle is adored for its showy summer blooms and multi-seasonal interest.

Features:

  • Height: Most dwarf and semi-dwarf varieties stay between 8–15 feet tall.
  • Flowers: Produces clusters of pink, purple, red, or white flowers in mid to late summer.
  • Bark: Attractive peeling bark reveals smooth, mottled trunks, adding beauty even in winter.

Why It’s Perfect for Home Gardens:

Crape Myrtles provide a long blooming season, often lasting up to 100 days—hence the nickname “the 100-day tree.” Their upright growth habit makes them a lovely centerpiece or border tree.

Care Tips:

  • Prefers full sun to maximize flowering.
  • Tolerant of heat and drought once established.
  • Light pruning in late winter encourages more blooms but avoid “topping” (severe cutting).

For gardeners in warm regions, the Crape Myrtle adds a splash of vibrant color and texture that few trees can match.


3. Flowering Dogwood (Cornus florida)

Symbolizing grace and charm, the Flowering Dogwood is a classic ornamental tree beloved for its stunning seasonal display.

Features:

  • Height: Grows 15–25 feet tall, ideal for smaller gardens.
  • Flowers: Blooms in spring with large, showy bracts in white, pink, or red.
  • Foliage: Lush green leaves turn rich red-purple in autumn.
  • Berries: Produces red berries that attract birds.

Why It’s Perfect for Home Gardens:

Flowering Dogwoods are not just ornamental but also wildlife-friendly, making them a great choice for eco-conscious gardeners. Their layered, horizontal branching structure adds elegance to garden landscapes.

Care Tips:

  • Best in well-drained, slightly acidic soil.
  • Prefers partial shade but can adapt to full sun in cooler climates.
  • Requires consistent moisture, especially in dry periods.

If you want a tree that combines beauty, wildlife benefits, and seasonal variation, the Flowering Dogwood is an excellent choice.


4. Dwarf Magnolia (Magnolia stellata or Magnolia ‘Little Gem’)

Magnolias are synonymous with grandeur, but dwarf varieties make it possible to enjoy their charm in small spaces.

Features:

  • Height: Compact cultivars grow between 8–15 feet.
  • Flowers: Star Magnolia (M. stellata) produces white star-shaped blooms in early spring, while ‘Little Gem’ offers creamy, fragrant flowers throughout summer.
  • Foliage: Glossy green leaves provide year-round appeal.

Why It’s Perfect for Home Gardens:

Dwarf Magnolias bring the luxurious look of magnolia blooms into smaller landscapes without overwhelming the space. Their fragrant flowers are perfect for gardens where sensory appeal matters.

Care Tips:

  • Thrives in full sun to partial shade.
  • Needs moist, well-drained soil.
  • Minimal pruning required—just remove dead or crossing branches.

A dwarf magnolia is the perfect blend of elegance and practicality for homeowners wanting a touch of southern charm.


5. Redbud (Cercis canadensis)

For a burst of early spring color, the Redbud tree is a standout ornamental.

Features:

  • Height: Usually 15–25 feet tall.
  • Flowers: Produces masses of pink or magenta pea-like flowers directly on its branches before leaves emerge in spring.
  • Foliage: Heart-shaped green leaves turn golden yellow in fall.

Why It’s Perfect for Home Gardens:

Redbuds are incredibly eye-catching in spring when covered in blossoms. Their modest size makes them suitable for smaller yards, and they provide interest from spring through fall.

Care Tips:

  • Grows well in full sun to partial shade.
  • Tolerates a variety of soils but prefers well-drained conditions.
  • Needs occasional pruning to maintain shape and remove dead branches.

With its vibrant blooms and heart-shaped leaves, the Redbud adds both color and romance to your garden design.


Designing with Small Ornamental Trees

When incorporating these trees into your home garden, keep in mind a few design principles:

  1. Placement Matters – Position trees as focal points near entrances, patios, or garden pathways to maximize their visual impact.
  2. Balance and Scale – Choose trees that complement the size of your garden and won’t overcrowd other plants.
  3. Seasonal Variety – Mix trees with different blooming times, foliage colors, and bark textures for year-round beauty.
  4. Wildlife Benefits – Opt for trees that also provide nectar, fruit, or shelter for birds and pollinators.

Final Thoughts

Small ornamental trees are nature’s perfect gift for homeowners who want to transform their garden into a serene, stylish, and seasonally vibrant retreat. From the fiery foliage of Japanese Maples to the cascading blooms of Crape Myrtles, each of these trees offers something unique.

By carefully selecting and caring for one—or several—of these trees, you can create a garden that isn’t just beautiful but also inviting, sustainable, and deeply personal.

Enhancing your home garden with ornamental trees is more than landscaping—it’s about crafting a space where you can relax, reconnect with nature, and take pride in every season’s display.

Step-by-Step Guide to Growing Dill in Your Garden

Step-by-Step Guide to Growing Dill in Your Garden

Dill (Anethum graveolens) is a versatile, aromatic herb cherished for its feathery leaves and distinctive flavor. Often used to season pickles, soups, fish, and salads, dill is one of the easiest herbs to grow at home. Not only does it enhance your dishes, but it also attracts beneficial insects like pollinators and predatory wasps, making it a fantastic companion plant in your garden. Whether you’re a beginner or an experienced gardener, growing dill can be a rewarding experience.

This step-by-step guide will walk you through everything you need to know about growing dill successfully in your garden—from choosing the right spot to harvesting fragrant leaves and seeds.


Step 1: Understand Dill’s Growing Needs

Before planting dill, it’s important to know what this herb thrives on:

  • Sunlight: Dill loves full sun, requiring at least 6–8 hours of direct sunlight daily.
  • Soil: Prefers well-draining, slightly acidic to neutral soil with a pH between 5.5 and 7.5. Loamy or sandy soil is best.
  • Watering: Dill needs consistent moisture, especially during germination, but avoid waterlogging.
  • Temperature: Grows best in cool to moderate temperatures, around 15–24°C (60–75°F). It tends to bolt quickly in hot weather.

Knowing these basics ensures you’ll create the right environment for your dill plants to thrive.


Step 2: Choose the Right Dill Variety

Several dill varieties exist, and your choice depends on whether you want leaves for cooking or seeds for pickling. Some popular types include:

  • Bouquet Dill: Fast-growing, excellent for seeds and quick harvest.
  • Mammoth Dill: Large plants with strong flavor, perfect for seed production.
  • Fernleaf Dill: Compact, slow to bolt, making it ideal for small gardens or containers.
  • Dukat Dill: Known for sweeter leaves, excellent for culinary use.

For beginners, Fernleaf Dill is a good choice since it is more manageable and suitable for container gardening.


Step 3: Prepare the Soil

To prepare your garden for dill planting:

  1. Loosen the Soil: Use a garden fork or tiller to loosen the soil up to 12 inches deep. Dill develops a long taproot and needs soft, aerated soil to grow well.
  2. Amend the Soil: Mix in compost or well-rotted manure to enrich the soil with organic matter. Avoid nitrogen-heavy fertilizers as they encourage excessive leaf growth but reduce flavor.
  3. Check Drainage: If your soil retains water, consider planting dill in raised beds or containers.

Step 4: Plant Dill Seeds

Dill grows best when sown directly into the soil since transplanting can disturb its taproot. Here’s how:

  1. Timing: Sow dill seeds outdoors after the last frost date in spring. For a continuous harvest, sow seeds every 2–3 weeks.
  2. Depth: Plant seeds about ¼ inch deep.
  3. Spacing: Thin seedlings to 12–18 inches apart once they reach 2–3 inches tall. Rows should be spaced 18–24 inches apart.
  4. Watering: Keep the soil consistently moist until seeds germinate, which usually takes 7–14 days.

Tip: If growing indoors, use a deep pot (at least 12 inches) to accommodate dill’s taproot.


Step 5: Care for Your Dill Plants

Once seedlings establish, dill requires minimal care, but following these practices will ensure healthy growth:

Watering

  • Water deeply once or twice a week, depending on rainfall.
  • Ensure soil is evenly moist but not soggy.

Fertilizing

  • Dill is not a heavy feeder. A light application of compost tea or balanced fertilizer every 4–6 weeks is enough.
  • Avoid over-fertilizing, which may reduce essential oil concentration, making dill less aromatic.

Mulching

  • Apply a thin layer of mulch around plants to retain moisture and suppress weeds.

Thinning & Support

  • Thin overcrowded seedlings to allow airflow and prevent disease.
  • Tall dill varieties may require staking to prevent bending or breakage from wind.

Step 6: Manage Pests and Diseases

Dill is relatively pest-resistant, but some issues may arise:

  • Pests: Aphids, caterpillars, and spider mites occasionally feed on dill. Handpick them or spray with neem oil.
  • Diseases: Fungal issues like powdery mildew may occur in humid conditions. Prevent by spacing plants properly and watering at the base rather than overhead.

A major benefit of dill is that it attracts ladybugs, hoverflies, and lacewings, which prey on harmful garden pests.


Step 7: Companion Planting with Dill

Dill works beautifully with certain plants but should be avoided near others:

  • Good Companions: Cabbage, broccoli, onions, cucumbers, and lettuce benefit from dill’s pest-repelling properties.
  • Bad Companions: Keep dill away from carrots and tomatoes since it may stunt their growth or cross-pollinate with carrots.

Step 8: Harvesting Dill Leaves

The most rewarding part of growing dill is harvesting its delicate leaves.

  • When to Harvest: Begin harvesting when plants are about 8 inches tall.
  • How to Harvest: Snip the feathery leaves using scissors, starting from the outer sections.
  • Frequency: Regular harvesting encourages new growth. Avoid cutting more than one-third of the plant at a time.

Fresh dill leaves have the strongest flavor, so harvest just before using them in recipes.


Step 9: Harvesting Dill Seeds

Dill seeds are as valuable as the leaves, especially for pickling.

  • When to Harvest: Seeds are ready when flower heads turn brown and seeds start to harden.
  • How to Collect: Cut seed heads and place them upside down in a paper bag. Hang the bag in a warm, dry place until seeds fall off.
  • Storage: Store seeds in airtight jars in a cool, dark place. Properly dried seeds last up to 3 years.

Step 10: Storing Dill

If you have more dill than you can use fresh, preserve it for later:

  • Refrigeration: Wrap fresh sprigs in damp paper towels and store in a plastic bag for up to a week.
  • Freezing: Chop leaves, place in ice cube trays with water or olive oil, and freeze.
  • Drying: Air-dry or use a dehydrator, though note that dried dill loses some flavor compared to frozen dill.

Step 11: Using Dill in the Kitchen

Dill enhances both simple and gourmet dishes. Common uses include:

  • Fresh leaves for salads, soups, dips, and fish dishes.
  • Seeds for pickling cucumbers, seasoning bread, and flavoring stews.
  • Infused oils, vinegars, and butters for aromatic cooking.

With dill at hand, your meals will always have a fresh and fragrant twist.


Conclusion

Growing dill in your garden is both simple and rewarding. This low-maintenance herb not only elevates your cooking with its distinct aroma and flavor but also improves your garden’s health by attracting pollinators and beneficial insects. From preparing the soil and planting seeds to harvesting leaves and seeds, dill provides multiple benefits at every stage of growth.

By following this step-by-step guide, even beginners can cultivate lush dill plants that produce flavorful leaves and seeds for months. So, the next time you want to add a fresh burst of flavor to your dishes or a splash of greenery to your garden, consider growing dill—it’s one of the most versatile herbs you can grow at home.

How to Grow Basil from Seeds for Beginners

How to Grow Basil from Seeds for Beginners

Basil, known as the “king of herbs,” is one of the most beloved plants in home gardens around the world. With its sweet aroma, rich flavor, and versatility in dishes like pasta, salads, soups, and pestos, basil has earned a spot as a must-have kitchen herb. Growing basil at home is not only cost-effective but also provides a fresh and endless supply of leaves whenever you need them.

For beginners, starting basil from seeds may seem challenging, but with the right techniques, anyone can enjoy success. In this guide, we’ll walk step-by-step through how to grow basil from seeds, ensuring you end up with lush, green plants and plenty of flavorful harvests.


Why Grow Basil from Seeds?

You can easily purchase basil plants from nurseries, but growing from seeds has many advantages:

  1. Cost-effective – A packet of seeds can produce dozens of plants for the same price as one nursery seedling.
  2. Variety – Seed packets offer a wide range of basil types like sweet basil, lemon basil, Thai basil, and purple basil, giving you more options.
  3. Satisfaction – Watching your basil sprout from tiny seeds into mature plants is rewarding and fun.
  4. Continuous harvest – You can start multiple batches of seeds throughout the season for an ongoing supply.

Choosing the Right Basil Seeds

Before planting, decide which basil variety best suits your taste and purpose:

  • Sweet Basil (Genovese) – The most common variety, perfect for Italian dishes and classic pesto.
  • Thai Basil – Spicy, licorice-like flavor, great for Asian cuisine.
  • Lemon Basil – Citrusy fragrance and flavor, wonderful in teas and fish dishes.
  • Purple Basil – Stunning deep-purple leaves with a slightly spicier flavor, excellent for decorative gardens.

For beginners, sweet basil is the easiest to start with, thanks to its fast germination and wide use in cooking.


Materials You’ll Need

To grow basil successfully from seeds, gather the following:

  • Basil seeds of your chosen variety
  • Seed-starting tray or small pots
  • Seed-starting mix (light, well-draining soil)
  • Spray bottle for watering
  • Clear plastic cover or plastic wrap (for humidity)
  • Sunny windowsill or grow light
  • Fertilizer (organic liquid fertilizer works best)
  • Small gardening scissors for harvesting

Step-by-Step Guide to Growing Basil from Seeds

1. Prepare the Soil Mix

Use a high-quality seed-starting mix instead of garden soil. This type of mix is lightweight, sterile, and drains well—important for delicate seedlings. Fill your seed tray or small pots with the mix, leaving a little space at the top.

2. Plant the Seeds

  • Sprinkle 2–3 basil seeds per cell or pot.
  • Cover them lightly with about 1/4 inch of soil. Basil seeds need some light to germinate, so don’t bury them too deeply.
  • Mist the surface gently with a spray bottle to moisten the soil.

3. Create a Humid Environment

Cover the tray with a clear plastic lid or plastic wrap to retain moisture and warmth. This mini-greenhouse effect encourages faster germination.

4. Provide Warmth and Light

  • Basil seeds germinate best in warm soil between 70–75°F (21–24°C). Keep your seed tray in a warm room or use a seed heat mat.
  • Place the tray on a sunny windowsill where it gets 6–8 hours of sunlight daily. If sunlight is limited, use grow lights.

5. Water Carefully

Keep the soil moist but not soggy. Basil seeds are tiny and can rot if overwatered. Use a spray bottle or bottom-watering method (placing the tray in a shallow dish of water for a few minutes).

6. Germination

Basil seeds typically sprout within 5–10 days. Once seedlings appear, remove the plastic cover to allow airflow and prevent mold growth.

7. Thin the Seedlings

When seedlings have developed their first true leaves, thin them by snipping weaker plants at the base with scissors. Keep only the strongest seedling per cell or pot.

8. Transplanting Seedlings

After 3–4 weeks, when the seedlings are 3–4 inches tall and the weather is warm (above 60°F / 15°C), they can be transplanted outdoors or into larger pots.

  • Space basil plants 10–12 inches apart to allow good airflow.
  • Choose a location with full sun (at least 6–8 hours daily).

Caring for Your Basil Plants

Growing basil doesn’t stop after transplanting. Here’s how to keep your plants healthy and productive:

1. Sunlight

Basil thrives in full sun. Place pots on sunny balconies, patios, or windowsills. Indoors, supplement with grow lights if natural light is weak.

2. Watering

Keep the soil consistently moist but avoid waterlogging. Basil prefers deep watering once the top inch of soil feels dry. Morning watering is best to reduce fungal issues.

3. Fertilizing

Feed basil with a diluted liquid fertilizer every 2–3 weeks. Too much fertilizer can reduce flavor, so keep it moderate.

4. Pinching and Pruning

To encourage bushy growth, pinch off the top leaves when the plant has 6–8 sets of leaves. Regularly removing the tips prevents basil from getting leggy and promotes more branching.

5. Prevent Flowering

If basil starts producing flower buds, pinch them off immediately. Once it flowers, the leaves become bitter and lose flavor.

6. Pests and Diseases

Watch out for pests like aphids, spider mites, and whiteflies. Neem oil or insecticidal soap can help control them. Ensure good airflow to prevent fungal diseases like downy mildew.


Harvesting Basil

One of the best parts of growing basil is harvesting its fresh, aromatic leaves.

  • Begin harvesting when plants are about 6–8 inches tall.
  • Always cut above a pair of leaves so the plant continues to branch and grow.
  • Never remove more than one-third of the plant at a time to avoid stressing it.
  • Harvest regularly to encourage continuous growth.

Storing Basil

Fresh basil is best used immediately, but if you have a large harvest:

  • Refrigeration – Store basil in a jar of water at room temperature; avoid refrigerating as cold damages leaves.
  • Freezing – Chop basil and freeze it in ice cube trays with olive oil for later cooking.
  • Drying – Air-dry or use a dehydrator, though dried basil loses some flavor compared to fresh or frozen.

Common Mistakes to Avoid

  1. Overwatering – Leads to root rot and fungus.
  2. Too little light – Causes weak, leggy plants.
  3. Allowing flowers to grow – Reduces leaf quality and flavor.
  4. Harvesting too aggressively – Weakens the plant if more than one-third is cut at once.
  5. Using garden soil indoors – It’s too heavy and may carry pests or diseases.

Conclusion

Growing basil from seeds is one of the easiest and most rewarding gardening projects for beginners. With just a little care—providing sunlight, proper watering, and regular pruning—you can enjoy an abundant supply of fresh, aromatic basil leaves throughout the growing season.

Whether you sprinkle it over pasta, blend it into pesto, or infuse it into refreshing teas, basil will bring flavor and fragrance straight from your garden to your kitchen. Once you experience the joy of growing basil from scratch, it may just become your favorite herb to cultivate year after year.

5 Colorful Annuals That Trail Beautifully in Baskets

5 Colorful Annuals That Trail Beautifully in Baskets

Hanging baskets overflowing with cascading flowers are one of the simplest ways to bring charm, color, and movement into any garden or outdoor space. Whether you have a small balcony, a porch, or a spacious backyard, trailing annuals create a dramatic effect with their vibrant colors and flowing growth habit. These plants are perfect for adding visual interest at eye level, softening hard edges, or brightening dull spaces.

In this article, we’ll explore five colorful annuals that trail beautifully in baskets, each with unique colors, textures, and growth habits. You’ll also learn tips for planting, caring for them, and designing your baskets for the most eye-catching displays.


Why Choose Trailing Annuals for Baskets?

Unlike upright plants that grow vertically, trailing annuals spill gracefully over the edges of containers. They’re especially ideal for:

  • Adding vertical interest – drawing the eye downward and outward.
  • Maximizing small spaces – balconies, patios, or porches gain lush greenery without needing much ground area.
  • Seasonal color – annuals bloom continuously throughout the growing season, ensuring vibrant displays.
  • Design flexibility – they pair well with upright “thrillers” and mounding “fillers” in the classic container design formula: thriller, filler, spiller.

1. Petunias (Petunia spp.)

Why they’re perfect for baskets:
Petunias are among the most popular annuals for hanging baskets due to their wide range of colors, patterns, and trailing habit. Varieties like Wave Petunias and Supertunias are specially bred for cascading growth, spreading up to three feet in length.

Colors & features:
Available in almost every shade imaginable—purple, pink, red, white, blue, and even striped or bi-colored. Their velvety blooms are trumpet-shaped and often fragrant, making them attractive to pollinators.

Care tips:

  • Plant in full sun for best flowering.
  • Water regularly but avoid waterlogging.
  • Deadhead (remove faded blooms) or choose self-cleaning varieties for less maintenance.
  • Feed with liquid fertilizer every 2 weeks for continuous blooms.

Design idea: Pair vibrant purple petunias with white bacopa for a contrasting cascading effect.


2. Lobelia (Lobelia erinus)

Why they’re perfect for baskets:
Lobelia creates an airy waterfall of tiny, jewel-toned flowers that adds delicacy and grace to hanging baskets. Their compact yet trailing growth makes them ideal for filling edges with soft, colorful trails.

Colors & features:
Most commonly seen in vivid shades of blue, but also available in purple, pink, and white. The small flowers appear in profusion, creating a cloud-like effect.

Care tips:

  • Prefers cooler weather; thrives in spring and fall.
  • Requires consistent moisture but well-drained soil.
  • Pinch back plants mid-season to encourage fresh blooms.
  • Grows well in partial sun to full sun, though too much heat may reduce flowering.

Design idea: Use lobelia as a “skirt” around upright geraniums in a basket for a lush, layered look.


3. Nasturtium (Tropaeolum majus)

Why they’re perfect for baskets:
Nasturtiums are fast-growing, low-maintenance annuals with edible leaves and flowers. Their trailing vines spill beautifully over baskets, bringing a cottage-garden charm to outdoor spaces.

Colors & features:
Brilliant shades of orange, yellow, and red dominate nasturtium flowers. The round, lily-pad-like leaves add a playful, unique foliage element.

Care tips:

  • Thrives in full sun but can tolerate partial shade.
  • Prefers poor, well-drained soil—too much fertilizer encourages leaves instead of blooms.
  • Drought-tolerant once established, but consistent watering keeps blooms vibrant.
  • Flowers and leaves are edible, with a peppery taste, great for salads.

Design idea: Hang nasturtium baskets near outdoor dining spaces for easy harvesting of edible flowers.


4. Sweet Alyssum (Lobularia maritima)

Why they’re perfect for baskets:
Sweet alyssum is prized for its delicate clusters of tiny flowers and honey-like fragrance. Its cascading habit creates a soft, romantic drape, especially when planted in mixed baskets.

Colors & features:
Traditionally white, but modern varieties also include pinks, purples, and lavenders. The dense clusters create a lacy effect, perfect for softening container edges.

Care tips:

  • Grows well in full sun to partial shade.
  • Regular trimming encourages reblooming.
  • Requires regular watering but tolerates short dry spells.
  • Excellent at attracting beneficial pollinators like bees.

Design idea: Pair trailing alyssum with bold petunias or calibrachoa for a mix of fragrance and vibrant color.


5. Calibrachoa (Calibrachoa spp.) – “Million Bells”

Why they’re perfect for baskets:
Often mistaken for miniature petunias, calibrachoa produces an abundance of small, bell-shaped flowers that trail elegantly over basket edges. With its nonstop blooming habit, it’s a top choice for season-long color.

Colors & features:
Available in almost every color—yellow, red, orange, purple, pink, and even multi-colored blends. Each plant produces hundreds of blooms, giving a “carpet of color” effect.

Care tips:

  • Needs full sun for best flowering.
  • Requires well-drained soil and frequent watering.
  • Self-cleaning, so no need to deadhead.
  • Feed with a balanced liquid fertilizer every 1–2 weeks.

Design idea: Mix calibrachoa in complementary shades—like orange and purple—for a vibrant, festival-like display.


Tips for Creating Stunning Hanging Baskets

To maximize the beauty of your trailing annuals:

  1. Choose the right basket size: Larger baskets (14–16 inches) hold more soil, retain moisture better, and support fuller growth.
  2. Use quality potting mix: Lightweight, well-draining soil enriched with compost or slow-release fertilizer ensures steady growth.
  3. Watering is key: Hanging baskets dry out quickly, especially in summer. Check daily and water until moisture seeps out of the bottom.
  4. Fertilize regularly: Trailing annuals bloom heavily and need consistent feeding. Liquid fertilizer every 2 weeks is ideal.
  5. Mix and match plants: Use a blend of colors, textures, and bloom sizes. Pair bold flowers like petunias with delicate ones like lobelia for contrast.

Conclusion

Trailing annuals are nature’s way of turning simple baskets into living waterfalls of color. With varieties like petunias, lobelia, nasturtiums, sweet alyssum, and calibrachoa, you can create vibrant, dynamic displays that brighten any space. Easy to grow and maintain, these plants reward you with continuous blooms and cascading beauty all season long.

Whether you’re enhancing a front porch, balcony, or garden pathway, these five colorful annuals will help you craft breathtaking baskets that trail gracefully and bring joy to your outdoor living spaces.